Natural movement flow is a key training element missing from most people’s fitness regimens.
Including movement combinations, ground-based exercises and sequences bridge the gap between linear resistance training and natural movement.
Practicing exercises in isolation essential for developing performance.
What is isolation?
Deadlifts, front squats, push-ups and pulling without the addition of any add-on exercises, using a work-then-rest format, is isolation.
You’re isolating an exercise and performing it for a set number of sets, reps and rest.
In a separate blog post, I dove deeper into Ido Portal’s general training template, which included an overview of his methods following this approach:
Isolation 👉 Integration 👉 Improvisation
Walk into any gym, and you’re likely going to see people exercising in isolation.
Perform a set of deadlifts, rest, check Instagram, a sip of water, then back to the next set of deadlifts.
This is the isolation phase of movement training.
Movement Flow
If you’re looking to add a fresh challenge to your workouts, combining exercises together to create movement flow sequences is a great way to do that.
Several years ago, I started mixing and matching traditional movement patterns and non-traditional exercises together to create 2 or 3 exercise flow sequences.
Here’s an example:
Gym workouts and real-world movement can be very different experiences.
While I value pursuing a mechanically perfect squat, do I ever stop to align my feet before squatting in a real-world scenario?
NEVER.
The modified squat I’m using in a real-world situation is often combined with 1 or 2 other movements.
Squat down, lunge up, twist and carry.
It’s rarely every just a perfect bodyweight squat in the real-world.
One goal of controlled environment training (aka gym workouts) is maximum transferability.
We lift and conditioning with the idea that it will enhance the physical moments (daily tasks, sports, and recreation, health, etc) help us improve the functionality of our body.
Yet, natural bodyweight movement is completely absent from most workout templates.
Crawling, climbing, rolling, navigating changing levels (laying to standing, fall training, etc), rotation or fusing exercises together in a pre-planned movement sequence or improvised movement work where you don’t know what’s coming next.
Practicing how to transition efficiently and effectively between two different body positions or patterns just makes sense to me.
Benefits of Movement Flow Training
👉 Improve movement IQ (confidence, dissipating fear of unexplored positions and tasks).
👉 Coordination and skill-building.
👉 Improving spatial awareness and how to transition between movements.
👉 Strength at more angles and positions.
👉 Injury mitigation via conditioning tissues to handle stress.
👉 Improve mind-body connection
👉 Control over one’s bodyweight.
👉 Fun, refreshing, never boring.
Movement flow is very challenging for the mind, which to me, is one of the greatest benefits of flow work.
While you’re learning a flow, you really have to think it through to execute it properly and avoid getting twisted up, trips and falls.
“Ok, so my hand goes here, foot over the top, create tension, then relax, drop down, etc…”
The elevated thinking involved with a lot of ground-based movements is a major benefit.
Plus, introducing flow training is refreshing and fun.
Hours in the gym working the same exercises, chasing the numbers (weight increases, more reps, more sets, faster finishing times) can get quite bland.
Remaining excited every to move every single day is best for the long-term.
5 Bodyweight Movement Combinations
#1Parallette Bar Pass Through to L-Sit
Parallette Bars are inexpensive to buy and easy to build from PVC pipes.
Start in a push-up position, passing the legs through the middle of the parallettes right into an L-Sit.
If an L-Sit is too aggressive, transition into a tuck position instead.
Hold the L-Sit for a 2-3 second count, then reverse the motion back to the start position.
Perform 2-3 sets of 8-10 reps.
No parallettes?
Chairs, stools or yoga blocks a good equipment substitutes.
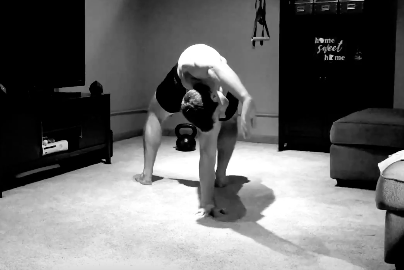
#2High Bridge Rotation to Lizard Crawl
A reasonable looking back bridge used to be impossible for me. My body was stiff as a board and incapable of arching through the spine. My shoulders lacked mobility, etc.
Using dedicated joint mobility drills really accelerated the process, expanding the positions I was able to get into and out of, but bulletproofing my joints as well.
MyDailyMobility is my recommendation for mobility conditioning.
Today, I practice some variation of back bridging in nearly every workout, either as maintenance or to make progress.
High Bridge Rotations require an adequate amount of spinal extension, shoulder mobility, stability and strength, which is why I recommend adopting a mobility program to accelerate the process.
From an exercise progress perspective, practicing basic back bridges is the starting point.
Adding in the rotation will come after.
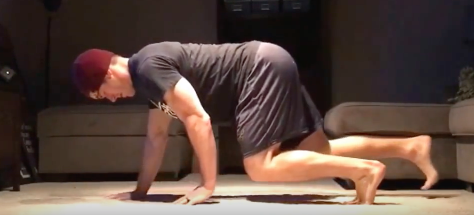
Transitioning out of the high bridge rotation can be a dizzying experience. Refocus your vision, lower down and crawl lizard-style.
The lizard crawl is an amazing strength and conditioning exercise.
Perform a push-up, hop forward into a deep squat position, place the hands on the floor slightly behind the butt cheeks as the legs extend and LIGHTLY tap the floor with the heels.
Reverse the flow.
Keep the sprawl motion soft and graceful.
#4Lunge to Pistol Squat Flow
Lower body training is essential for health and performance.
Our legs need to be strong and well-conditioned, but also mobile and capable of expressing strength and stability throughout a large range of motion.
This combination connects two movement patterns:lunges and squats.
During the transition from front to back, do your best to avoid making contact with the floor.
This is one combination probably best executed for reps.
3-5 sets of 6-10 reps per side will work.
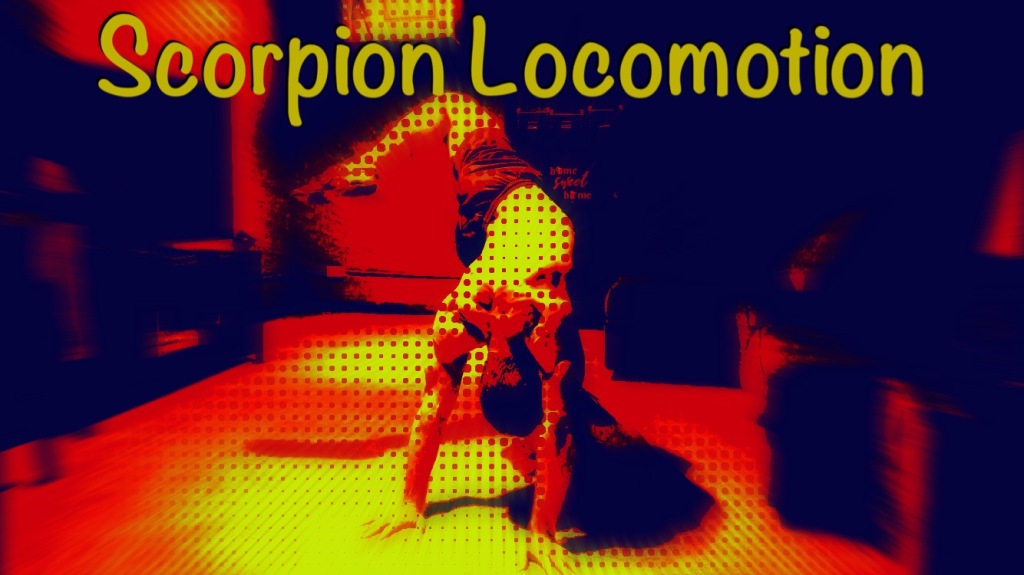
#5Lizard Crawl + Low Scorpion
This lizard crawl + low scorpion combination is a unique, high-value movement combination.
There’s no beginning or end with this sequence, which makes it a great bodyweight-based cardio alternative.
This flow is relatively compact, making it perfect for a small home gym or other imperfect training spaces.
Practice this sequence for repetitions or time.
I like to set a timer and go. Not having to keep track of reps allows me to focus on what my body is doing.
Time-wise, I’ve used this flow for 5+ minutes continuous and it’s a challenge every time.
MOVEMENT20XX
Fusing movements together to create flows is a great addition to traditional lifting and cardio, and is sure to bring a refreshing challenge into workouts.
If you want to learn more about movement flow training, I highly recommend checking out the MOVEMENT20XXprogram from Vahva Fitness.
MOVEMENT20XX is one of the best movement-based products I’ve come across.
Eero Westerberg did a brilliant job organizing and communicating the techniques of each exercise, how to create flows and leverage this method of training to build a high functioning body.
Animal Flow is a ground based movement system that leverages multi-planar movements, transitions and various crawling patterns to create an effective form of exercise.
Scorpion, is a unique exercise with roots in Yoga, yet adapted and modernized by Animal Flow.
The benefits of practicing exercises like Scorpion on a regular basis are many, and discussed throughout this post.
Scorpion is a versatile exercise. We can slip it into warm ups, workouts, movement sequences and improvised flows.
The aim of this post is to give you information on Scorpion technique, benefits and ideas on how to integrate this great exercise into your current or future workout regimen.
More information on Animal Flow will be provided at the end of the article.
Animal Flow Scorpion
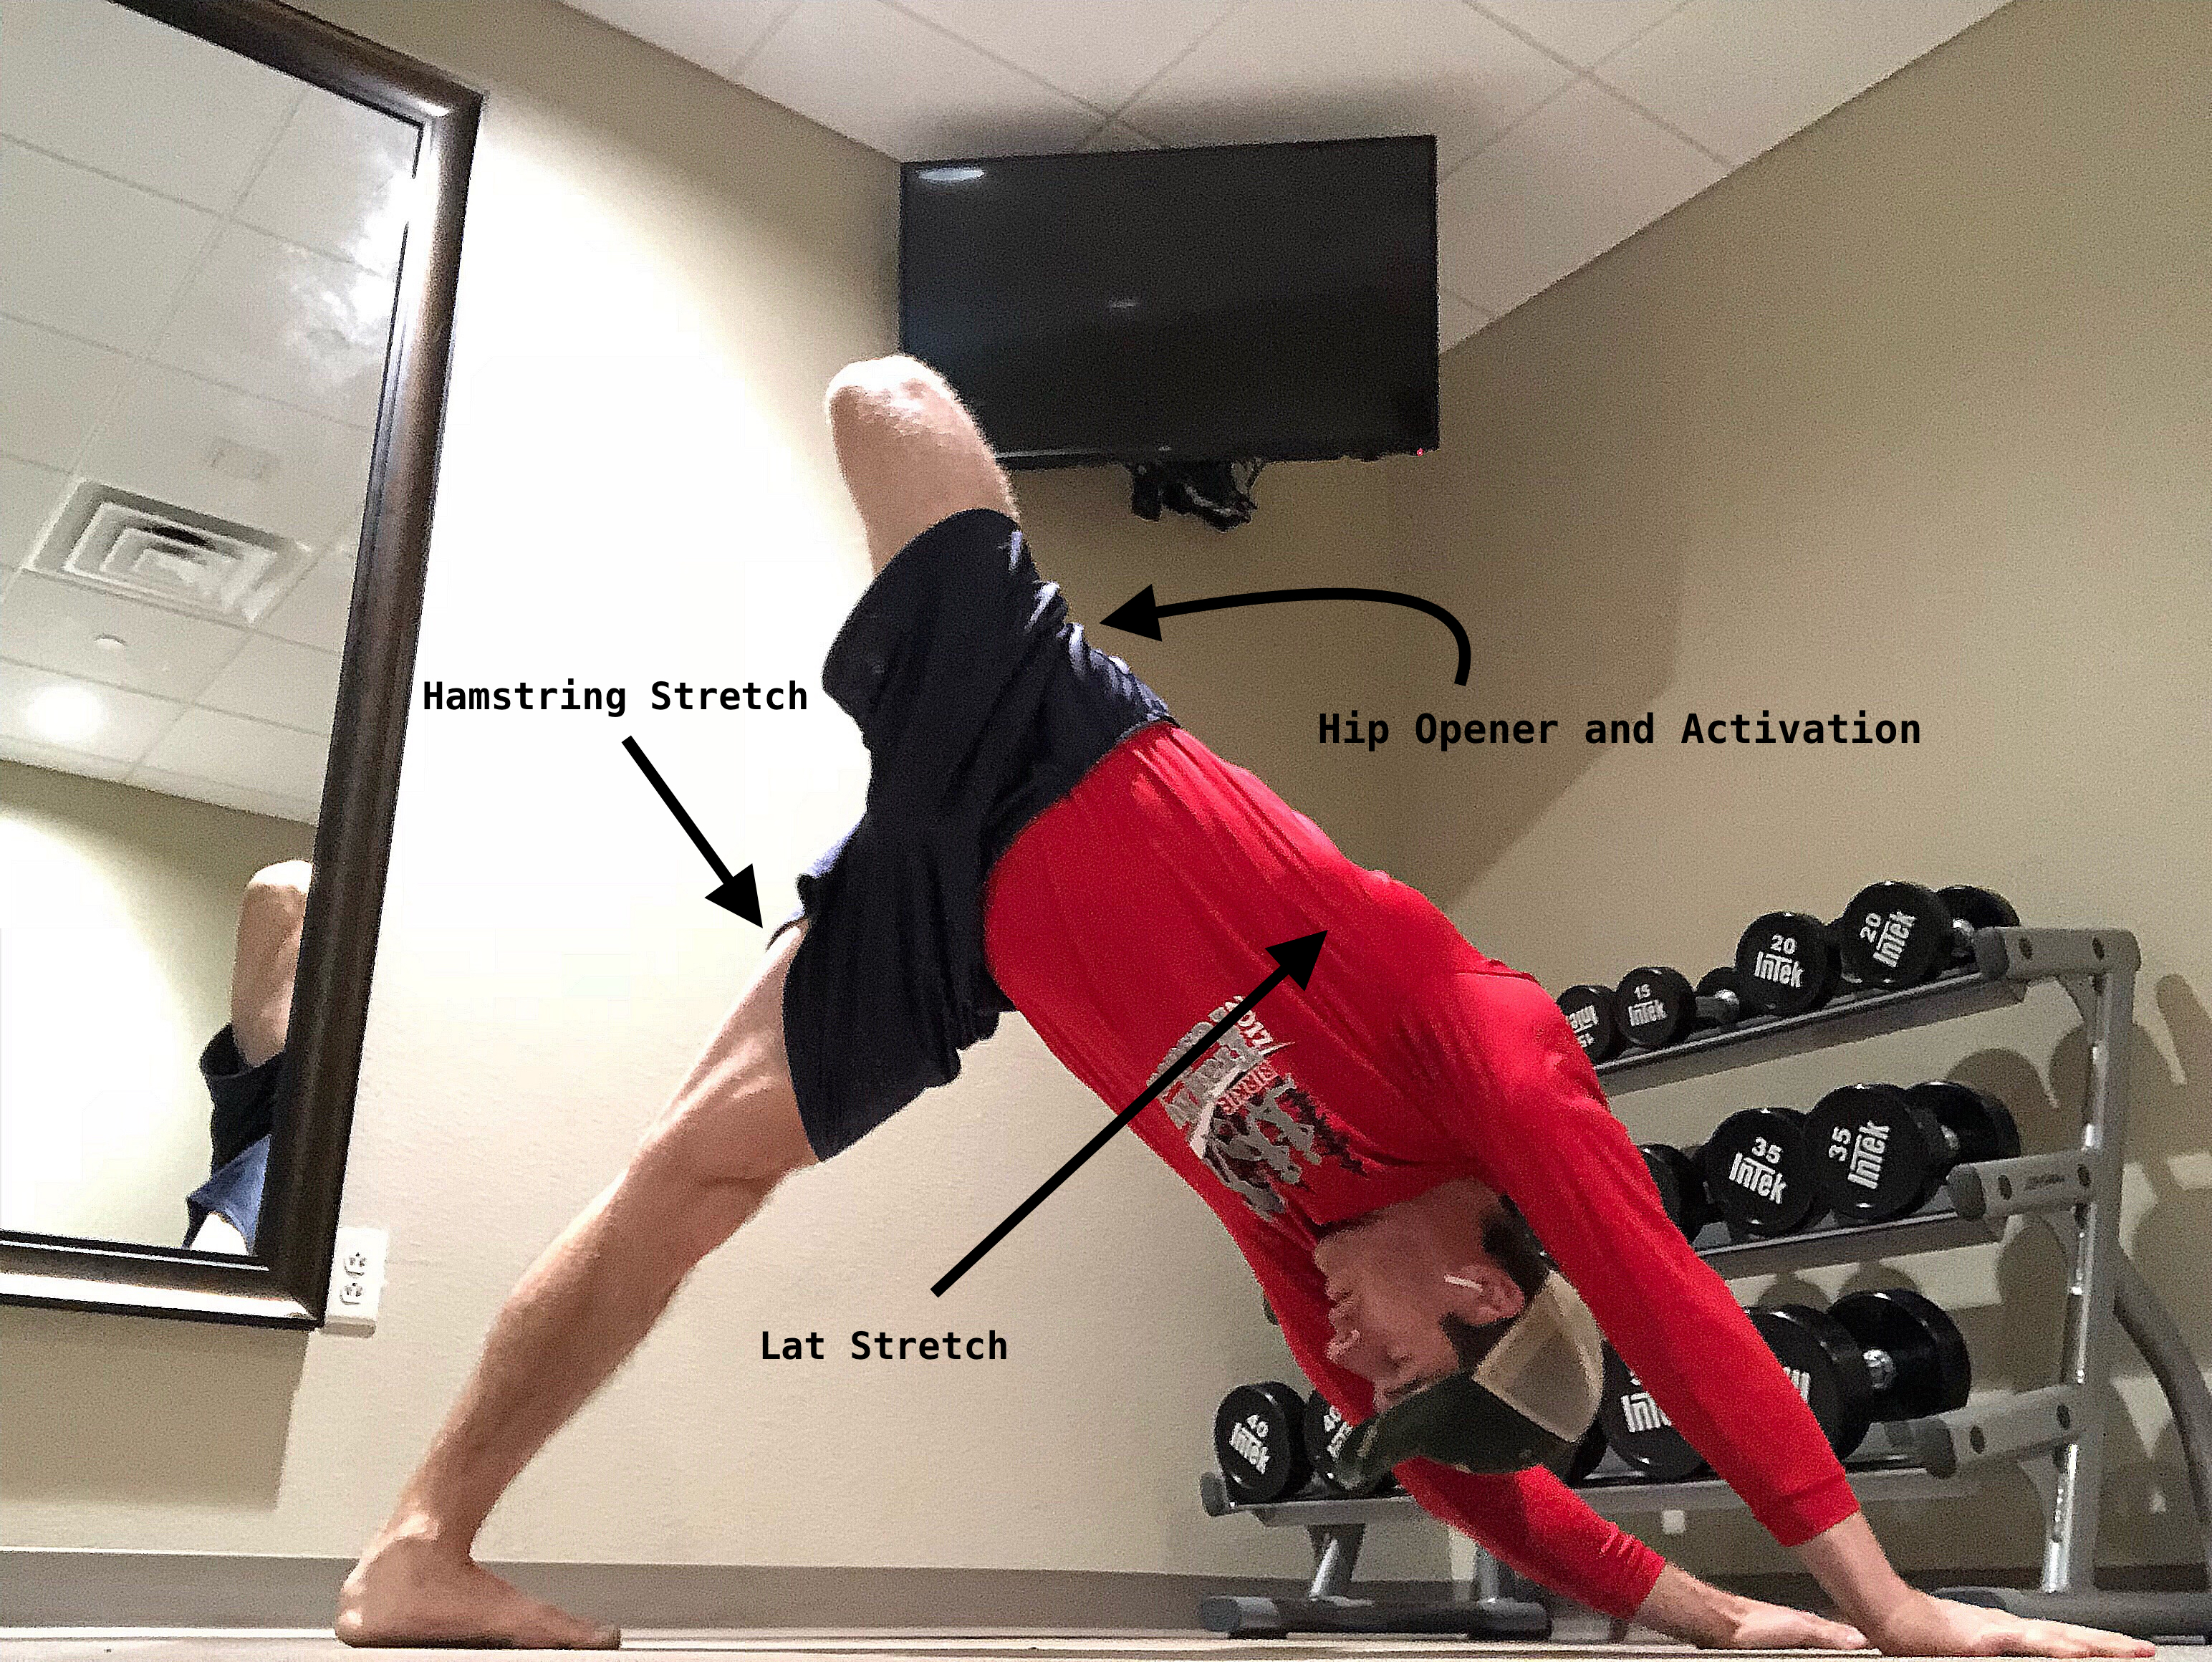
Benefits of the Scorpion exercise
Lengthening of the hamstrings and lats
Opening up and activating the hips
Thoracic spine extension and rotation
Shoulder strength and stability
Rotational core training
Uniquely challenging multi-planar movement
Ground based, bodyweight, equipment free, minimal space requirements
Just one exercise, all of those benefits.
Ground based movement exposes your movement flaws.
To be blunt, expect to feel stiff and weak.
Newbies to ground based movement training should anticipate getting tripped up for a while.
The mechanics of the new exercises are foreign, the spatial awareness is new, the timing, tension, breathing, range of motion, etc… is new.
Consistent practice yields improvement.
Scorpion Movement Technique
Bottom Position
The bottom position of Scorpion involves trunk flexion and a bit of rotation.
You can see my spine flexed, core hollowed out.
Cues:
–Eyes toward the hands
–Shoulders over the hands
–Round the back slightly to make room for the knee coming across
Slide the knee across the midline of the body to the opposite side elbow.
Once there, “kiss” the knee cap to the elbow.
Reverse the motion to start the upward phase of Scorpion.
* Tip:Limit momentum from the cross-body knee touch.Move slow and with control.If you cannot touch the knee to the opposite side elbow without compensating, that’s fine!Work the range of motion that you’re able to control.
**Warning: core cramping possible and likely***
Driving the knee across the midline to the opposite side elbow is difficult shit.
People who practice this type of training regularly (Yogis, etc) make it look easy, but it’s not.
Cramps and whole body shaking is likely.
Top Position
At the top of the Scorpion, the body moves into trunk extension and rotation.
Cues:
– Ears between the arms
– Keep anchored leg as straight at the knee, heel down.
– “Reach” with the elevated foot, squeeze the glute
– Relax the jaw and neck (breathe)
What you should FEEL during Scorpion…
Moving is a multi-sensory experience.
You hear, see and feel with every movement.
Knowing what to feel can speed up the learning curve with new movements and also give feedback that you’re doing the movement correctly.
Bottom position of Scorpion
Shoulder and chest burn from stabilizing bodyweight in the high plank position.
Intense core burn from the cross body knee to elbow.
Top position of Scorpion:
Suspended glute is WORKNG HARD, feel the burn here.
Hip flexor stretch.
Backside stretch running down the anchored leg from glute to the heel.
Side body stretch from the rotation (mainly the lats)
Personally, my lats (hips to arm pits) get a big stretch while practicing scorpion.
How to Use Animal Flow Scorpion into Workouts
Scorpion is extremely versatile for workouts.
Slip it into warm ups, the workout itself or use it as part of a flow.
Warm Up
Animal flow exercises are ideal to use in warm ups.
Animal Flow movements are multi-planar, and very unique compared to what most people are doing in daily workouts.
Exercises like the Scorpion move the entire body through a unique range of motion, challenging the core, hips and shoulders.
Ground based movements condition your body’s spatial awareness, strength, mobility, stability and efficiency.
Lunges, squats, kettlebell swings, over head pressing, push ups and vertical pulling exercises such as pull ups and chin ups are all great exercises, but they lack rotation.
Training your body to move well on a whim, in a wide variety of environments, on different terrain, over/under/through various obstacles or while completing unique tasks amplifies your movement capacity.
If you’re currently lifting weights and doing cardio, GOOD!
This article is NOT a call to stop doing those activities.
Animal Flow style training and a quality resistance/cardio training regimen can and should coexist.
Combining strength, conditioning and forms of natural movement creates the new gold standard in fitness.
Scorpion is the tip of the iceberg when it comes to ground based movement. There’s so much more to explore.
If you really want to received full benefit of flow work and ground based training, I highly recommend checking out Animal Flow.
The Crab Reach is a great bodyweight exercise with a whole bunch of options of use before, during and after a workout.
For a simple bodyweight move, this exercise offers a lot of benefits.
Benefits of the Crab Reach
Posterior chain activation and hip extension
Active Thoracic Mobility
Anterior body stretch (hip flexors, quads, torso)
Shoulder stability/endurance emphasis in loaded shoulder
Trunk rotation
Right and Left Side
Low-impact
Combat Sitting
The Crab Reach is a great exercise to battle/off-set the negative effect of long duration sitting.
It’s not “the cure”, the only tool or the “best” tool, but it’s a good one to implement on a regular basis.
Reversing aches and pains caused by primarily long duration sitting requires dedication, discipline, and volume.There is no quick fix.
A quick hip flexor stretch, thoracic mobilization, and glute bridge are not going to cancel out 8+ hours of sitting in the same turtle-like, wound up position.
Body restoration takes time, effort, consistency and volume.Lots of repetitions, likely lots of time and an aggressive mindset.Assuming you’re doing everything right, expect improvements over time.
Most people slump like a turtle while sitting. Sitting like a slouchy turtle for 8-10 hours per day, 5 days per week isn’t good for our bodies.
We become the positions we use most.
Fill in Gaps with Movement Training
Strength and conditioning built from traditional resistance training can benefit greatly from practicing multi-planar movements like the crab reach.
Deadlifts are great. Chin-ups are great. Rows, push-ups and rotational core training are all great.
These are fundamental movements to build a strong body.
But there are movement gaps leftover from each of these exercises.
Once you’re on the floor crawling, transitioning between locomotion exercises, you find out pretty quick there’s a difference between squatting up and down with lots of weight on the bar and moving gracefully through space.
It’s humbling.
Exploring bodyweight oriented movement is a key piece of the fitness puzzle that will improve your movement IQ and create a well-functioning body.
What’s a well-functioning body?
Strong (proportionate to what a person needs to thrive in daily life), mobile, confident in many different postures/positions/patterns, conditioned, free of aches and pains.
Ground-based conditioning is a great way to backfill any gaps resistance training is not designed to address.
Free-flowing, multi-planar fitness.
Practicing postures and movement patterns less common to daily life.
Improving strength, mobility and stability in uncommon movements make everyday exercises feel easy.
Rotation
Looking at the average person’s exercise favorites, it’s usually a shortlist made up of linear resistance training and a sprinkling of cardio.
Break out of the linear matrix.
Every repetition of Crab Reach moves the body through a multi-planar, active range of motion.
Through the range of motion, the body will extend and rotate.
The twist is visible from the hip flexor, moving diagonally through the mid-section to the loaded shoulder.
How to Use Crab Reach in Workouts
Ground-based bodyweight movement is extremely versatile.
Keeping it simple, here are a few different options to integrate the crab reach into daily fitness:
In the warm-up
Filler exercise during a lifting session
As part of a flow sequence
Crab Reach can be practiced in isolation or as a combination.
I recommend practicing new movements in isolation to increase focus on technique.
Practicing an exercise in isolation is better to understand the mechanics and demands is best.
Isolating the exercise will give you the opportunity to focus on the mechanics of the movement and spatial awareness.
Warming Up with the Crab Reach
Movement flow exercises are perfect for pre-workout warm-ups.
These movements are generally dynamic, full range of motion exercises that require movement into and out unique body positions, angles and tempo.
Crab reach can serve as a valuable movement prep before exercises like deadlifts or kettlebell swings.
Crab Reach as Part of the Workout
Positioning the Crab Reach as part of a Tri-Set is a great way to isolate and practice the exercise while staying active/productive during a strength training session.
Here’s an example a simple Tri-Set:
Exercise A) Front Squats
Exercise B) Chin-Ups
Exercise C)Crab Reach
Crab Reach acts as a non-competing exercise with the front squats and chin-ups.
Focus on a slow and controlled tempo through the fullest range of motion you can make happen.
After you are feeling good about the mechanics, increase the volume.
Don’t be shy about bumping up the reps to 15-20 reps per side. Setting a timer can be a nice option.
Not interested in counting reps?
Set a timer and go. Alternating right and lefts for 2-5 minute timed sets can free’s you up from having to count reps.
Summary…
Bodyweight ground-based movements are effective for building strength, mobility, endurance, and movement IQ
Crab Reach is a versatile exercise that can be performed anywhere and anytime.
Benefits of the Crab Reach include posterior chain activation, anterior body lengthening, thoracic mobility, body awareness in space.
The Crab Reach is great to include in warm-ups, during the workout or as flow training.
The Crab Reach is an effective exercise to help mitigate aches/pains from sitting, restore function.
Want to Go Deeper? Check This Out…
Vahva Fitness has created a fully streamable bodyweight-based movement program called Movement20XX.
The movement curriculum in Movement20XX is progressive, challenging, and scalable for beginners, intermediates and all the way up to people seeking movement mastery.
Movement training is easily scaled to suit each person’s skill level.
Movement20XX is one of a small number of hand-picked online fitness programs I support.
Direct core training is an essential part of any workout program.
The fitness industry gets into highschool level fights over whether direct core training necessary, but since I believe in training the entire body…
…. core training is a must.
Boom.
In a way, if your core sucks, you suck.
A strong core protects the spine and serves as a conduit for force transmission between the upper and lower body.
Ground reaction forces travel from the feet, up through the mid-section and out through body tips of the fingers.
Highly controversial fitness trainer Uncle David Weck taught me that.
If the muscles that wrap around the torso are weak or under-performing, energy leaks and both performance and function can suffer.
A strong bodies has a strong core.
A balanced, comprehensive approach to core focused training will calbrate the body to properly absorb force and produce force in all planes of movement.
This is a giant list, so let’s not waste any more time.
Here are 15 different core based exercises worth slipping into your next workout…
1.Anti-Extension Roll Outs (Ab Wheel Roll Outs)
For $15 on Amazon, you can purchase an Ab Wheel Roller.Ab Wheel Roll Outs are anti-extension core exercise, great for building not only core strength but core endurance.
In a tall kneeling position, slowly roll out way from the knees.
During this rollout motion, cue your hips to fall outward at the same pace as the upper body.
Roll as far out as you can control. If the lower back caves, you’ve gone to far.
Pull yourself back in using your mid-section, lats and pec muscles (gripping the handles hard).
During the most difficult portion of the roll-out, “hollow” out the mid-section.
The hollow body position tucks the ribs down while the navel curls toward the ribs. The result is a curved body shape or the “hollow” body.
2.Turkish Get-Ups
As far as productivity and global training effect, Turkish Get Ups (TGUs) are hard to beat.
Turkish Get Ups are a total body exercise.
The goal of the Turkish Get Up is to transition from a lying position (supine) to a standing position, reverse the order and return back to the original lying position.
Controlling the weight during the up-down sequence is fatiguing not only for the core but for the loaded shoulder as well.
Turkish Get Ups are best performed with kettlebells or dumbbells, though nearly any object of weight can be substituted.I’ve used sandbags, liquid filled milk cartons, barbells, weight vests, shoes, and weight plates to name a few.
Turkish Get Ups are best learned by isolating and practicing each segment.
Stabilizing the weight overhead is can be draining for the stabilizing muscles of the shoulder.However, the time spent in this over-chest/over-head position is fantastic for building shoulder stability, which can help with injury mitigation and performance.
Standing up and laying back down equals one rep.
Sidenote: I’ve used Turkish Get Ups as my “workout of the day” for years. I set a timer (10, 15, 20 minutes) and alternate sides until the timer sounds.
I use a variety of weights during this time, work several repetitions in a row without putting the weight down or mix up the way I stand up and lay back down for variation (squat, lunge, etc).I’ve added a simple press at each of the 7 steps, performed kettlebell swings cleans and snatches at the halfway point (standing position).
Dragon Flags (and variations) are one of my favorite core exercises.
Why? Because they’re hard as hell!
Dragon Flags require a tremendous amount of effort and total body tension.
Ly on your back, grab onto a bench, squat rack, heavy sandbag or any other immovable object with the hands positioned above the head.
Raise the feet up to the ceiling. Making the body as straight as possible from ankles to shoulders, begin lowering to the floor.
SLOW IT DOWN, resist gravity’s pull.
Working the descent of the dragon flag is known as the “eccentric”. For beginners, only focusing on quality eccentrics is just fine.
If you’re feeling strong, Advanced Trainees can reverse the eccentric and ascend back to the top.
Do not lose the straight line from head to toe.
After listening to Gymnastics Bodies founder Coach Christopher Sommer’s podcasts with Tim Ferriss, I dropped Dragon Flags into my workouts as a mainstay core conditioning exercise.
Planks are a fundamental static core drill and a position worth exploring.
The video demonstrates rotational side planks.
I use these (and many other plank variations) frequently.
Reps, sets and time to hold each plank exercise is a highly debated topic.
If you can comfortably hold a plank for 90-120 seconds without strain, you’re likely wasting your time and the return on effort has diminished.
Move on to more challenging core work.
4.Crawling
Crawling is a critical component for early childhood physical development, but also effective for building strength and conditioning in the gym.
The more “adult” we become, the more we move away from activities we engaged in as kids.
This is de-evolution. It’s not good.
You either use it, or you lose it.
And as adults, we tend to move less and less with age, and if we do move, it’s generally isolated to linear walking or machine-based cardio.
Adults need to revisit moving like they did when they were kids.
Get on the floor and crawl.
5.Lizard Crawl
The Lizard Crawl is an advanced crawling pattern and probably the king of all ground-based crawling variations.
Ground-based conditioning is bodyweight training with no equipment needed.
6.Offset/Asymmetric Pressing and Holds
Grab a dowel, barbell or a stronger broomstick.
Dangle an object (with a handle) like a kettlebell or wrap a resistance band on one end.
Now, press or hold that dowel without changing body position or allow the object to slip off.Confused?Me too.Watch the video above and it will all make more sense.
Objects we encounter in life are rarely perfectly balanced.
Weight is often distributed unevenly, which means we have to adapt to awkward loads, recalibrate on the fly and push on.
7.One Arm Push Ups
A lesson in indirect core training, one arm push-ups will challenge the muscles of the midsection better than 95% of core based exercises.
One-arm push-ups train single arm pressing strength like few other exercises.
Global Bodyweight Training does a great job laying out exercise progressions leading to the one arm push up.
8.L-Sits (all variations)
L-Sits are a beginner exercise in the gymnastics training realm.
Very humbling to think about it with that perspective, since L-Sits are a tough ass exercise.
Creating an “L” between your upper body and lower body (at the hips) extremely taxing for the hip flexors and lower abdominal muscles.
Starting out, you’ll have to dial back the duration of your L-Sit efforts to 5-10 seconds of work, with plenty of rest between each effort.
In time, the duration of the hold will increase as your body adapts to the demands.
Of all of the basic gymnastics postures, I have found L-Sits to be an absolute game-changer for building core strength.
Including L-Sits in my workouts, 2-3 times per week has increased my hold duration time from a few mediocre sets of 10-15 seconds to 30+ seconds with legs moving above parallel.
9.Arch Body Holds
Lay on the floor face down, arms and legs stretched out straight above/below.
Lift the upper body and lower body at the same time, arching your back toward your butt.
Hold this Superman-like position for 5-10 seconds and release back to the floor.
Repeat for repetitions.
Progress Arch Body Holds by increasing the time of the hold.
10.Hollow Body Variations (rocking and static holds)
Hollow body holds (progressing into rocking) conditioning the entire front side of the body, from fingertips to toe tips.
The quads, diaphragm, abdominals, hip flexors all get some love during hollow body training.
11.Toes to Bar
Toes to Bar improves core strength, midline endurance while improving grip, shoulder health and back performance.
Prolonged hanging from a bar, branch or anything overhead is therapeutic for the upper body.
There are few different variations of the Toes to Bar exercise, kipping (ballistic) or strict.
12.Bridging
Bridging is can help offset the modern-day desk warrior posture.
Following the lead-up bridge positions and working shoulder and mid-back mobility, hip flexor flexibility and glute strength can inch you closer to a full bridge.
I’d also suggest training active mobility.
MyDailyMobilityis a follow-along mobility program with updated workouts every week. Taking the time to train mobility will bulletproof joints against injury and increase performance.
Once you’re able to hold a static high bridge for 45-60 seconds, start exploring adding the rotational piece into the bridge movement.
13.Dynamic High Plank Exercises (pull-throughs, push-pull)
14.Landmine Grapplers
The landmine trainer provides the opportunity to train many angled exercises and rotational exercises not possible without the pivoting sleeve.
If you’ve got access to a barbell and a few weight plates, you can start training landmine exercises right away.
Before you read this, please know I am a HUGE advocate for moving workouts into the home setting.
Cutting the cord on a big box gym membership is a little like cutting the cord on cable television. I’ve done both so I’ve got some experience here. Change is hard. Sounds dumb but when I cut cable television for good, I had a few weeks of not knowing what the hell to do with myself at night.
It was purely conditioning and habit driving these feelings.
But eventually, I adapted and transitioned my time to more productive activities. Of course economical streaming subscriptions also helped fill the void (Netflix, Hulu, Prime Video, etc).
Anyways, there’s some initial hesitation, weighing, back and forth, and although it sounds kind of funny… anxiety involved with cancelling a gym membership (or cable television).
“What will I do without my gym membership?”
Step oneis to ask yourself if you’re actually using your gym membership. If you are, how many days a week are you going? Are you getting results from that money and time investment?
These are simple questions. Are you going to the gym enough to make the cost of keeping the membership worth while?
A lot of people go to the gym with intentions of losing weight, building strength, getting healthy, yet have very little if anything to show for it.
No offense to these folks, but there’s a lot of people that fall into this category. Gyms love them because not achieving results (aka: spinning tires in the mud) is great for ensuring a steady revenue stream. The anxiety is too high to cancel the membership. So, you pay every month.
If you do go to the gym and you enjoy it, KEEP YOUR MEMBERSHIP.
The goal of this article isn’t to project a rigid stance on big box gyms and paint them as being a bad place.
My goal is to shed light on the effectiveness of working out at home and let you know it’s more than doable, it’s becoming the new standard. Lots of people aren’t aware of this. #themoreyouknow
A lot of folks use gyms as a social hang out just as people get memberships at the local country club to hang out with their buddies.
Well built gyms often offer amenities to families (pools, child care, classes, etc). So for these folks, spending the money might be well worth it.
Mom and Dad can get some exercise in while the kids play in the pool with licensed gym staff.
But…
… cancelling your gym membership will free up funds, time and hopefully bring some excitement back to your workouts.
The biggest benefit (in my opinion) of moving workouts to a home gym set up is the freeing up of TIME.
When I was younger I had a much harder time understanding the value of my time on this earth. My perception was that I had all the time in the world. Wrong.
Fast forward several birthdays later, I feel much differently. I have a desire to own as much of my time as possible. Life’s too short.
Google “Memento Mori Chart” and fill one of those out if you really want the realities on the shortness of life.
Balancing family, career and finding time for recreation can eat up most of the time in a day.
Working out at a membership based brick and mortar gym certainly has it’s advantages, but it also has limitations which often go overlooked.
#1 Paying for something you don’t use.
A gym membership going unused or not being used on a regular basis is a waste of money.
#2 Time.
How much is your time worth?
Time is our most precious commodity, and we can never get time back. Drive time to and from, changing clothes time, waiting for equipment time, workout time, shower time, etc. Big box gyms are a TIME SUCK.
#3 Safe equipment.
Most gyms still refuse to offer fitness equipment considered to be “taboo” or “dangerous” because it’s a liability for injury.
So, the average big box gym is littered with fixed range of motion (aka: artificial and unnatural range of motion cardio and resistance machines)
There’s a reason most people despise exercise… because spending hours on these machines is uneventful and completely against human nature. We were force fed the concept of exercising on fixed machines back in the 1960’s and 1970’s and somehow the concept survived to 2018.
Those feelings of boredom while “ellipticalling” are real… and more importantly they are NOT WRONG. Your body craves robust movement, exploration, change of direction, challenge.
It took 8+ years for most gyms to offer kettlebells to clients for fear of throwing them through mirrors, dropping them on toes, or blowing out backs from poor technique. All reasonable concerns.
To be blunt, if your gym isn’t offering and promoting alternative modalities of building fitness such as kettlebells, you’re missing out.
#4 Personal training is expensive
God bless personal trainers and their ongoing commitment to educating the public on the benefits of exercise.
But personal training is expensive.
Personal training is expensive regardless if you’re training 1-on-1, semi private or in a group setting. At $5, $10 or in some areas $70-$80 per session you could pivot and transition those dollars into one of many online training programs (probably starting with bodyweight based training like yoga or calisthenics) and gradually purchase some home equipment.
Start with a simple pair of dumbbells or kettlebells, maybe a suspension trainer. These are three of the most versatile pieces of gym equipment on the market.
Yes, I know barbell training is amazing. But even in the year 2018, barbells freak a lot of people out. I don’t know if their is data on this, but it’s anecdotal fact for me in conversations with people.
So, do your homework on dumbbells, kettlebells or a suspension trainer.
For the cost of one month of gym membership, you can buy one or possibly two pieces of equipment. A kettlebell is a one-time purchase. That kettlebell will outlast your life.
The gym membership model succeeds and relies on signing up customers who don’t set foot in the door.
I didn’t make this up.
Listen, if I owned a gym I wouldn’t want all of my members to workout daily and tear up my expensive equipment.
It would be a hassle and lost dollars for me to constantly fix broken down cardio machines, reface beat up barbells and weight plates, patch holes in benches, etc.
No, no… if I owned a gym, give me your money and stay at home.
Here are some great articles regarding gym memberships:
“Joining a gym is an interesting form of what behavioral economists call pre-commitment,” says Kevin Volpp, director of the Center for Health Incentives and Behavioral Economics at the Wharton School. Volpp says we actually like the idea of being locked into a gym contract … at first, anyway. “They’re picturing the ‘new me’ who’s actually going to go to the gym three times a week and become a physical fitness machine.” We convince ourselves that since we have committed to putting down money for a year, we will make ourselves go to the gym. And then, of course, we don’t.
Working out at home is not for everyone.
“Wait, I thought you just told me that…”
I did.
Before you cancel your gym membership, it’s important to understand your habits and personality.
Cancelling a gym membership with intentions of working out at home, but never actually getting the home workout habit to stick is not good. It’s a step in the wrong direction.
If you were exercising twice a week at a gym, but now exercising ZERO times per week after making the transition, this is not a good scenario.
While taking workouts into the home setting is loaded with advantages, a lot of people may find it difficult to stick to a workout regimen at home.
I’ve found that inability to make the home workout habit stick are pretty similar to the reasons a lot of people shouldn’t have a home-based career.
The comfortable environment of the home setting can kill off motivation for physical exertion and breed complacency.
The temptation to do anything but be productive and get work done is too great.
Before cancelling a gym membership, test the waters by bringing 1 or 2 workouts into the home. Keep it simple. Work some bodyweight sessions, play around with the space you’ve got and get acclimated.
No equipment means no workout!
Survey says: Wrong.
A common perception is that quality exercise cannot happen without the presence of fancy fitness machines.
Heavenly Father… what are you supposed to do without any fitness equipment?!
I can see how a person would have this opinion, I really can. But the reality is you DON’T KNOW WHAT YOU DON’T KNOW.
If you have these feelings, you’ve got to explore your options.
Here are some ideas for you…
Yoga, Animal Flow, KinStretch, gymnastics and calisthenics and resistance training are all INCREDIBLE forms of movement that can provide far more benefit for your body (looks, feel and performance) than any machine ever will.
Listen, exercise machines have their place, but moving your body in a natural environment should be a primary goal. Your body and the ground. Start there.
What about walking?
Walking, time and time again has proven to be potent form of daily activity. Start with 10 minutes per day, every single day. See what happens.
The Economics of Building a Home Gym
Before buying home gym equipment there are two important points to consider:
Quality gym equipment often isn’t cheap at time of purchase. The upfront cost of purchasing the equipment will likely exceed what you were paying per month at your gym. However, shift your attention to the long-term value instead of the short-term. Most quality gym equipment should last you lifetime versus paying for monthly gym memberships.
What’s the cost of not exercising across the long-term? This question can be hard to wrap one’s head around, but seriously, in 10, 20, 30 years, what will be the cost you pay for not taking care of yourself physically when you had the chance.
A badass home gym could be built by shifting spending habits for 6-8 months.
Many people won’t buy gym equipment for the home because they don’t know how to use it. In 1996, this was a valid concern, but not in 2017. This little thing called the internet has created massive opportunities to learn basic technique of physical conditioning, all the way to movement mastery.
Fitness is now digital. The information is distributed through video, audio and the written word, there is education that appeals to all forms of learning. A lot of it is given away for free.
Everything a person could want to know about fitness is on the internet.
If you’re one of those anti-internet people… please stop. Yes, the internet has some crap floating around but so does society.
Take ownership, research, experiment, explore, refine, get curious, learn.
I want this article to open your eyes to a different perspective on working out, where you do it, how you do it and a alternative view to transitioning your health regimen back to home base.
Even if you don’t make the switch, it’s important to have the information.
Please let me comments or questions.
Check out some of these other topics of I’ve explored on the blog…
Workout finishers (also known as metabolic finishers or conditioning finishers) are a short burst series of exercises at the end of a workout designed to complement strength based training.
A workout finisher can be a single exercise, like a burpee, or a series of exercises strung together (squat, push up, pull up, etc). Finishers typically take 1-10 minutes to complete, and can be organized into intervals or metabolic resistance training (think thrusters).
A tough finisher will burn extra calories, boost cardio and work capacity while increasing the fat burning potential of the days workout.
These days, I mainly string together several different exercises, using a variety of movement patterns and equipment. From time to time, I’ll schedule a single exercise finisher, but it’s rare. Burpees are a great exercise to use if you’re only going to do choose one.
Mixing Kettlebell Swings and Burpees
This post is all about one of the toughest workout finishers…
The word “burpee” makes me cringe. Burpees are a brutally effective exercise and I rarely program burpees into my own training simply because they are hard.
I shouldn’t admit that.
Burpees jack up your heart rate fast. Few other bodyweight exercises compare to burpees for total body conditioning. Burpees, though simplistic, are extremely functional. Transitioning up from a low ground position to a standing position happens in sports all of time. Maybe not for high reps like we program in a workout, but it happens.
How do you make the burpee experience harder? Add in some kettlebell swings.
This kettlebell swing and burpee workout finisher is brutal. Back when my equipment arsenal consisted of 3 kettlebells, I gave the kettlebell swing/burpee finisher a go.
The combination fit the equipment and space I had available perfectly.
I stopped twice on my first attempt. Not for extended periods, but long enough to consider throwing in the towel. It’s hard to remember my finishing time, but I think it was less than 8 minutes.
I do remember the fatigue however, it was hard to gather myself. I ate a pile of food that night and the following morning and the afterburn effect was potent.
So I share this workout finisher with you. Keep it in your back pocket on the days where you’ve completed your skill work and strength training and still high on motivation.
Equipment needed…
You’ll need one kettlebell and some space to for burpees. Ideally the burpees will include a squat jump each time (aka: full burpees), so take into account overhead clearance. Choose a kettlebell you can swing for 15-20 repetitions comfortably. It will be sub-maximal weight for the swings.
I recommend most males to swing a 24kg or a 28kg kettlebell and females to swing a 20kg or a 24 kg kettlebell.
Of course, you can swing whatever size kettlebell you want, the recommendations are just generalized suggestions. A heavier or lighter kettlebell may be chosen based on your fitness level and experience with swings under extreme fatigue.
By design, this workout finisher has 100 kettlebell swings and 55 burpees.
The kettlebell swing reps remain fixed at 10, while the burpees increase by 1 rep each round. When you finish the 10th burpee on the last round, you’re done.
When you’re doing this workout finisher, it’s easy to lose track of what round you’re on. I’ve performed several rounds twice by mistake.
Modification and Variations
Decrease Difficulty
There are a ton of options to reduce the stress of this workout finisher, here some examples:
• Decrease kettlebell swings to 5 reps each round • Swing lighter kettlebell (keep reps at 10) • Burpee with no jump (removing the jump makes burpees easier) • Burpee with no push up and no jump (again, much easier)
Don’t forget… take rest if you need it. Resting is a simple way to decrease the difficulty of this workout finisher. The goal should be to push through each round without rest, but if you need it and technique depends on it, take it.
Increase Difficulty
Careful here. Having completed this workout finisher periodically over the years, I know how brutal it can be.
Before trying to make this harder, set a target finish time finish of 6 minutes or less. Anything over 6 minutes and there is no reason to make it harder. You’ve got progress to make before increasing the difficulty.
If you finish in less than 6 minutes, consider sizing up the weight of the kettlebell or adding an extra round where you’ll complete 11 burpees in the final effort.
I don’t foresee a lot of people needing more intensity, but there are always options to do so.
Variations to the original…
Smaller Cycles w/ rest periods
Keep kettlebell swings at 10 reps but stop at 5 reps of burpees.
Round 1: 10 Kettlebell Swings + 1 Burpee
Round 2: 10 Kettlebell Swings + 2 Burpees
Round 3: 10 Kettlebell Swings + 3 Burpees
Round 4: 10 Kettlebell Swings + 4 Burpees
Round 5: 10 Kettlebell Swings + 5 Burpees
Above is an example of one round.
Rest for 90sec-120sec after this round before starting the next round. Complete anywhere from 2-5 rounds total. This decrease the working time in half and give you a chance to rest before going again.
Break up the Burpees into separate movements
Instead of performing a full burpee with a push up and squat jump, break it up. Now you’ll be performing like so:
The afterburn effect of this workout finisher is HUGE. If you’re pushing your boundaries, you’ll feel it for hours post-workout. Personally, I like to position something like this after a strength training session where I know the next day is a rest day.
Workout finishers are great for adding in a little work capacity and increasing the fat loss potential of a workout.
“Hmmm… Animal Flow looks a bit moving yoga. Then again, it also looks a bit like Capoeira. Well, maybe not. Maybe it looks like gymnastics. Yes, definitely gymnastics. Wait… there’s another yoga exercise, now it looks like yoga again.”
These are exact thoughts I had watching Mike Fitch demonstrating a movement flow several years ago.
Watching Mike flow seamlessly around the empty room captivated me. Even to the untrained eye, it’s unmistakable when you see someone who has complete dominance (aka control) over their body. When you see it, you know it.
I crashed head first into Ido Portal Method and Animal Flow at about the same time. Which makes sense now since they are both rooted deeply in bodyweight based movement.
At the time, Ido Portal was growing at breakneck speed, but he had not (and still hasn’t) packaged his movement system into a product. Animal Flow did have a product, which it has now updated into Animal Flow 2.0.
Crawling patterns and primal movement were gaining traction as validated tactics to reset one’s body, improve strength, stability, core integration, body controls, yadda yadda yadda. In reflection, it makes sense Animal Flow caught my eye because Traveling Forms (Ape, Beast, Crab) are crawling locomotion patterns. For branding purposes, Animal Flow refers to these three basic forms as “animal-like” exercises which they are, but they are also crawling patterns.
Piggybacking the opening paragraph of this blog post, the most important point I could make about integrating Animal Flow into your workouts is this: Shape, mold and make it function any way that suits you.
Animal Flow is a hybrid training system constructed from many other movement disciplines, therefore it can serve you any way you need it to.
Cardio conditioning? Move fast, aggressive, lots of transitions, soft but quick floor contacts.
Recovery? Full range of motion, move slow, controlled, breathe deep, hold positions, find the stretch.
Pre-Workout Warm Up? Move through a full range of motion, activate hard at end range looking for expanded range, build the tempo up from slow to fast.
Animal Flow as the workout? Leverage lots of different tempos, explore many positions, make shapes, breathe, bring the heart rate up, lower it back down, improvise, etc.
Ground-based movement can serve an infinite number of purposes. How do you want it to serve your needs? That’s what I’d like you to keep in mind as you read through the rest of this article.
The purpose of this article is two-fold:
1) Share Animal Flow movement tactics with people who aren’t currently familiar.
2) Expand the application of Animal Flow exercises.
In we go…
I won’t pretend like it was love at first sight.
It took me a while to jump into Animal Flow. I was already working yoga steadily on non-workout days. Days when my body needed a rest but craved a sweat, range of motion, slow tempo and breath work. You know, the calming effect yoga is famous for.
Once I finally committed to mixing in Traveling Forms more seriously, I could immediately feel the difference. I felt more connected from my top half through my core to my bottom half. Shoulders opened up and felt more stable. General body awareness in space and control improved also.
Stepping away from lifting is a major reason my body “opened up” and felt more fluid and connected. Pressing pause on lifting for several days if not several weeks (even months) is something that changed my entire perspective on daily physical activity. I recommend anyone who’s been a die-hard lifter to remove yourself from weight training for an extended period of time. Don’t stop exercising during this time, rather, seek out alternatives.
Animal Flow is a perfect place to start and explore.
Using Animal Flow exercises for Pre-Workout Warm-Up
Initially, I started by using Traveling Forms during my warm-up. Here is how I structured everything…
Pre-Workout Warm-Up (15-20 minutes) Foam Roll + Thoracic Mobility Peanut Drills Dynamic Stretching Activation (using mini bands, wall slides, etc) Animal Flow Traveling Forms (and maybe some jump rope) The Workout
After working through more traditional strength and conditioning stretches, activation and mobility, I’d start crawling for 3-8 minutes, sometimes followed by jumping rope, sometimes not.
In the beginning, 3 minutes of crawling patterns seemed daunting. After a month or so, I was crawling without rest for 8-10 minutes. Challenging? Hell yes, but the body acclimates quickly with consistent practice.
This pre-workout routine provided enough time to explore each of the three Traveling Forms in isolation. Isolating new exercises has always been my strategy. Isolating an exercise allows me to focus on the mechanics of the movement.
Favoritism and familiarity lead me to practice Beast and Crab first. Beast is a prone crawling pattern (chest to the floor) and Crab is a supine crawling pattern (chest to the ceiling). Beast and Crab are essentially opposites, and therefore complement each other very well. The difference in body position changes the stress on the core and arms, front, back, and side of the body. Each movement also challenges active mobility differently.
Currently, my home gym allows for 12 feet of crawling in any one direction. Working with my training space, I would crawl 12 feet forward, reverse it and crawl 12 feet back. The first couple of workouts I programmed low volume and a much slower tempo crawl.
Beast – Crawl down and back 5 times (120 ft of crawling) Crab – Crawl down and back 5 times (120 ft of crawling)
Start Workout.
From here, I ramped it up pretty quickly. I get antsy.
Combine Beast and Crab together, crawling down and back 6 times each without rest. This will take about 5-6 minutes to complete with a steady tempo.
Once I started to explore and understand Animal Flow Switches, I integrated them into my little Beast/Crab crawling medley…
Forward Beast + Under-Switch + Reverse Crab
Forward Crab + Under-Switch + Reverse Beast
Start Workout.
Rinse and repeat for time. This combination is simple and effective. Crawl down forward, switch, come back in reverse.
Next, I played around with longer duration for each Traveling Form, ramping it up to 1-minute per exercise before switching to the next…
I recommend working these patterns for as long as you like. Don’t overthink it. The risk of overdoing crawling is almost non-existent. Of course, if your plan is resistance training afterward, leave something in the tank for the training session.
Eventually, I introduced Lateral Traveling Ape to the pre-workout routine. Lateral Traveling Ape was my first real exposure to side-to-side locomotion. I struggled. What my mind’s eye thought I was doing was not what the playback on my iPhone camera showed. My technique was brutal. But the pattern was completely foreign.
I practiced Lateral Traveling Ape more incrementally than Beast or Crab, starting with two reps in one direction, two reps back to where I started. Rest and repeat. A smooth flowing Lateral Traveling Ape did not come easily for me.
Fast forward to current day, I’ll rip out pre-workout Traveling Forms almost in any structure I like. Lately, a medley I’ve been enjoying has been:
Cycle 8 minutes of: Lateral Traveling Ape 16 ft Switch Beast Crawl 16 ft Switch Crab Crawl 16 ft
Start Workout.
Cycle through each of the 3 Traveling Forms for 8 minutes without rest. You’ll never feel more ready for a workout as you will after this effective little medley.
The badass thing about Animal Flow exercises is that your body will learn the mechanics quickly with diligent practice. Lateral Traveling Ape went from being an exercise I avoided to one of my favorites.
Personally, I think there are a lot of people dabbling with crawling patterns, which is great, but not including enough volume to see desired results. I’m not implying you’ve got crawl for a .5 mile every workout, but if you really want to get benefit from crawling patterns, play around with increasing the volume (without bending on technique).
A Tool for Recovery…
I love many aspects of yoga and typically feel great afterward, but I don’t always enjoy how stationary yoga is. Yoga sessions can feel rather restricting. Stay on the mat, you must never part with your mat.
Animal Flow takes features of yoga and transforms it into a dynamic practice. Essentially, you can move around the room until you’re ready to hold a pose or position.
Transitioning into an animal-like crawl to relocate or continue switching body positions to find the next hold.
Combining movement with elements of yoga creates a comprehensive training session pack with benefits from each. Here is a simple recovery workout…
Lateral Traveling Ape x10 yards Beast Crawl x10 yards Downward Dog x 5 long breaths Reverse Beast x10 yards Downward Dog x 5 long breaths Crab Crawl x 10 yards Table-Top x 5 long breaths Reverse Crab Crawl x10 yards Crab with Reach x3 each side *** Repeat the cycle for time or rounds***
This simple recovery workout seamlessly fuses yoga with Animal Flow. I’ve worked sequences like this for 20-30 minutes and felt absolutely fantastic afterward.
Or, give this more comprehensive recovery session a try, which includes drills from Kinstretch and Animal Flow.
Start with some basic Kinstretch drills to nourish the joints, finishing with some dynamic Animal Flow exercises to further open up and re-educate the body to cross-crawling patterns, reaching and positional switches.
Kinstretch: Hip CAR’s x5 each leg Spinal CAR’s x3 Shoulder CAR’s x5 each arm
… Followed by…
Animal Flow: Beast Crawl x 10 yards Reverse Beast Crawl x 10 yards Crab Crawl x 10 yards Reverse Crab Crawl x 10 yards Lateral Traveling Ape x 10 yards Crab with Reach x 5 each side Slow Under-Switch x 5 each side Scorpion Switch x 3 each Slow Side Kick-Throughs x 3 each side *** Repeat for 3-4 rounds ***
*** Sidenote: If you aren’t familiar with Kinstretch, check it out. It will change your life.
This will take 30 minutes of your time (or less). Move slowly through each of these exercises in descending order (top to bottom). Breathe deep with control, owning each movement.
This workout has a boatload of natural joint mobility and muscle activation work in it. Crab with Reach alone is a million dollar movement. If you’re activating extending the hips and reaching hard in the high position of each Scorpion Switch, there is likely to be some soreness the next day.
A gentle recovery workout like this helps to open up the joints, turn on important muscles, challenge multi-planar core stability and while getting a sweat without the beaten down feeling.
It might seem off-topic to list sweating as a benefit of a recovery workout, but considering the skin is the largest organ of the human body and sweating helps eliminate toxins from the body, support proper immune function and fight out toxin-related diseases.
Animal Flow and Kettlebells for Cardio
Virtually any exercise or series of exercises can be adjusted to create a cardio training effect.
Limiting rest, increasing the tempo and exercise complexity are all fantastic ways to further tax the cardiovascular system.
The recipe is simple: global bodyweight movements recruit more muscles plus higher intensity tempo with little or no rest in between elevates heart rate and respiration. Across time and with enough intensity, the body will head straight into oxygen debt. Huffing and puffing begin.
Ground-based movements are a total body experience. Combining various Traveling Forms (ape, beast, crab, lizard crawl variations, etc) and Switches creates a potent multi-planar training effect.
Kick-Throughs… Kick-Throughs are an excellent ground-based cardio exercise. Kick-Throughs, similar to any other Animal Flow exercise, can be scaled to suit any skill or fitness level. The explosive nature of faster tempo Kick-Through’s makes them ideal for cardio.
There are two primary variations: Forward and Side Kick-Throughs.
Many people will find Side Kick-Throughs to be a great entry into higher tempo ground-based movement.
Side Kick-Throughs how-to: • Start in the quadruped position (static Beast), hands and feet on the floor, knees hovering an inch above the floor. • Lift and slide one leg underneath your body as you pivot on the supporting foot. • Reach with the sliding leg and open up the chest. • Return to the quadruped position and perform the same action on the opposite side.
Gradually increase the speed of the kick-through to the point where technique remains intact but on the verge of “out of control”. 15-20 repetitions per side of Side Kick-Throughs will get the heart rate going. Another measurement of work is time. Anywhere from 30-45 seconds of exertion is a great place to start.
Kick-Throughs pair very well with kettlebells, as you’ll see below.
Select two kettlebell exercises and one variation of kick-throughs. Here are two great examples.
Workout A Kettlebell Swings x8-10 Side Kick-Throughs x8 each side Kettlebell Overhead Press x8 each arm *Repeat for 6-8 rounds, rest for 45-70 seconds between each round.
Or…
Workout B Kettlebell Gorilla Row x8 each arm Forward Kick-Throughs x5 each side Kettlebell Deadlift x10 *Repeat for 6-8 rounds, rest for 45-70 seconds between each round.
Or…
Mix and Match: Alternate Workout A and Workout B Round 1: Workout A Rest 60 seconds Round 2: Workout B Rest 60 seconds Round 3: Workout A Rest 60 seconds Round 4: Workout B *** Repeat for 8 rounds ***
Each round you’re performing 3 completely different exercises, using the same tool (kettlebells). If you’re tight on space, limited on equipment or looking to keep training simple and effective, this is a fantastic option.
Improvised Workouts Ground Based Conditioning Plus Animal Flow…
This is my favorite part of this article.
Animal Flow is a flexible movement discipline that can serve as little or big of a role in your training as you need to. In this section, I’ll talk about using Animal Flow as the workout, not just part of the workout.
Practicing many of the Animal Flow elements in isolation leads to stringing together longer pre-planned sequences, which eventually leads to the total improvisation of a workout or freestyle. This is the “flow” part of Animal Flow.
Flowing between various exercises for several minutes changed the game for me. It’s liberating to move around an open space without having a plan, just an understanding of knowing you can move in and out of many different positions, making shapes, increasing tempo, slowing tempo, etc. You’re in control of the session, your mind-body connection is communicating the way it was designed.
Very poetic.
Improvised flow is the highest form of training. It’s essentially movement play and exploration. I touched on this in my popular Ido Portal Method post.
I have no recommendations for improvised workouts, as they are improvised. You make it up as you go. Take what you know about Animal Flow: locomotion patterns, switches, transitions, etc… and build a sequence.
There is no wrong way to flow, just start moving.
Workouts like this can last as long as you’d like. I’ve improvised for 20-30 minutes, increasing the speed of movement sporadically throughout the session but constantly moving and changing positions.
Closing Personal Commentary…
Equipment free, ground-based conditioning has expanded my conditioning in incredible ways. I am a huge advocate of rowing ergs, airbikes, skiergs and the like, but conditioning on an open floor is entirely different than machine-based conditioning.
I’m not anti-machine.
I still use my Assault Bike and Concept2 Rowing Erg 2-3 times per week. Not for extended periods, but long enough to matter.
Taking a break from machine-based cardio will make you realize how mindless it is. I’m not saying it’s easy. It’s difficult but mindless. The gears and levers of a cardio machine move through a fixed pattern/range of motion. How hard you push yourself on the machine is entirely up to you. It’s a mind game. It’s willpower.
The amount of energy required to crawl, bend, twist, lunge, reach, roll, sprawl, rotate, squat, press around an open floor intensely for an extended period of time is mind-blowing. Especially if you are new to it.
Movement 20XXis an innovative, gap bridging movement system built around fundamental bodyweight exercise, organized in a readymade package.
The movement system is comprised of a wide range of exercise progressions to get a beginner flowing in their first workout, leading up to advanced movement mastery.
Movement 20XX exercises and workouts are designed to help people improve strength, flexibility, body control and coordination.
The most impressive aspect of Movement 20XX is how well the movements and transitions fit together to create an artistic, fluid practice.
Ground-based conditioning is a missing element in a lot of workout regimens and can help reboot the body’s natural ability to move well.
It’s just you and some empty space on the floor, which is both daunting and liberating.
The brilliance of Movement 20XX is it’s a collection of many different movement disciplines.
Instead of being pigeon-holed to training with one movement methodology, Movement 20XX teaches key elements from yoga, martial arts, parkour, break dancing and gymnastics to name a few.
The emphasis on teaching locomotion patterns like the lizard crawl is awesome.
Expanding movement capacity and improving movement I.Q. through natural ground-based movements is as functional as it gets.
Locomotion patterns make up 1 of 6 components in the Animal Flow training system.
What is Locomotion?
Locomotion exercises often mimic the movements of animals. Basic crawling variations are an example. Crawling is a full-body conditioning pattern.
Each moving form has an emphasis on contralateral movement, which means the movement occurs across the body’s midline.
The opposite hand and foot are going to move together. Contralateral movements are great for building body awareness and coordination.
Locomotion, in laymen’s terms, means moving from one place to another. Walking, skipping, running, pushing a heavy sled, farmer walks are all variations of locomotion.
A large majority of locomotion patterns are performed in a quadrupedal position, with hands pressed against the floor supporting body weight under the shoulder, knees flexed near 90 degrees and only the balls of the feet supporting the lower body.
Benefits of Movement 20XX locomotion exercises?
Humans are bipedal creatures.
We move most efficiently in an upright position using our legs to propel us through space.
Practicing locomotion patterns with the body and head in unique positions other than upright walking position (head on shoulders, eyes forward, arms hanging at the sides, etc) challenges the body to re-orient itself to those uncommon positions.
Quadrupedal, animal-like movement patterns expand our movement capacities, making our body a more complete piece of machinery.
Sure, one could argue that life happens on two-feet and that’s partially true.
However, there are many moments in life where we must be able to move into (and out of) positions outside of normal vertical standing
Supplementing a training regimen with ground-based conditioning trains a person to be more capable of handling known and unknown tasks.
It’s hard to predict when you’ll need to be strong in a quadruped position, right?
When you need it, you need it.
A great goal of any fitness program should be to create a higher level of movement efficiency across a broader range of positions.
Locomotion movements provide a gentle loading for the upper extremities and demand the core musculature sort out new stimuli (cross-crawling).
Yes, locomotion work is going to light up your core.
Other benefits of locomotion training:
Establish neuromuscular links throughout the kinetic exercise chain.
Movements are multi-planar, preparing the body for different planes of motion.
Up and down
Side to Side
Transverse (rotational)
Flexibility through movement and the opening of fascial lines and slings.
Full articulation of joints to reinforce mobility.
Reconnecting the brain-body activity with contra-lateral movements.
Exposure of asymmetries and energy leaks as you move closer to the ground (versus standing).
Ground flow drills are not boring, which is a really unscientific yet powerful reason to start exploring the practice.
If your current workout regimen has you bored out of your mind, you better switch it up quickly. People who get bored often stop exercising all together. It’s very predictable.
Let’s take look at each of the three basic forms taught in Animal Flow…
Side-to-Side Locomotion
Side-to-side (lateral) locomotion is a challenge technique-wise.
Timing, force absorption, core compression, and flexibility are all equally important
This same pattern can be executed forward and backward.
Quadrupedal Crawling
Crawling is a fantastic activity for the pre-workout warm-up, or as a main component of the workout.
This dynamic quadrupedal activity reinforces and builds reflexive strength along with connecting the left side of the brain with the right side.
Small space? No worries.
Crawling is an adaptable exercise that can fit whatever size space you are training in.
In my old basement gym, I had less than 10 feet in any one direction. Adapt to small spaces by making more trips down and back. For folks who are stuck in hotel rooms while traveling, crawling is PERFECT.
8-10 feet of space is all you need to crawl.
Crawling can be modified to suit a wide variety of training stimuli and goals. Ramp up the tempo to elicit a cardio training effect or slow it down for movement control.
Beginners should practice crawling slow and controlled to establish a familiarization with technique.
Crawling can be performed in high and low positions, forward and backward, side to side.
Supine Crab Crawl
Supine crawling, sometimes referred to as the “Crab Crawl” positions the front of the body toward the ceiling with arms supporting behind the back and inches in front of the glutes.
This crawling variation engages the backside muscles of the legs to a higher degree while challenging shoulder extension.
The Crab Crawl is a unique exercise because of the way it engages the lats, traps and external shoulder rotators, opens up the anterior chain while simultaneously activating.
How to Add Locomotion Drills to Your Workout
Locomotion exercises can be used as warm-up drills, recovery from the previous day’s training stress, included in a circuit or practiced as part of a long duration flow.
Natural bodyweight movement can be practiced anytime, in virtually any environment.
Personally, I prefer a “less but better” training philosophy.
Starting out, I practiced basic locomotion patterns for 10-15 minutes before any resistance training or cardio work, using brutally slow tempos to gain an understanding of mechanics and build motor control and timing.
Slow movement training reveals movement deficits.
As mentioned earlier in this post, crawling can be used for cardio conditioning. Increase the tempo and intensity. Move faster. Or, crawl for a longer duration. Maintain quality of movement, however.
Change of direction, body position, loading the upper extremities, tension, crawling, sprawling will jack up your heart rate as fast as any other form of cardio. All without any equipment.
Movement 20XX
Movement 20XX is the program I recommend for those who want to begin exploring ground-based training.
Eero Westerberg has done a fantastic job creating a comprehensive movement platform that really delivers significant benefits to customers.
Movement 20XX is packed with basic (similar to what I shared today) and advanced exercises and technique tutorials for those exercises, leading to flow training.
Flow training is highly challenging and fun.
Subscribe
Make sure to subscribe to this blog to receive updates on future posts. I will never spam you, it’s not my style.
YouTube andInstagram are also great resources for constantly updated exercise progressions and variations, flow training and how I’m integrating techniques to create hybrid workouts.
Some of the toughest workouts I’ve ever tested are the simplest.
Fewer exercises, less complexity, just nose to the grindstone and sweat.
Yesterday’s workout involved only one exercise and a simple goal.
[If you’ve read other posts on this blog, I am rarely an advocate for extremely high volume/high intensity training. For the under-prepared person, it can increase the risk of unnecessary injury]
That being said 👆, I love to get after it and test my work capacity periodically.
Here’s the Workout
Exercise: Full Burpees
Repetitions:200
Time:20-minute time limit
What’s a Full Burpee?
Each repetition must be a FULL BURPEE.
👉 Modified Squat/Hinge
👉 Sprawl
👉 Push-Up (chest to floor)
👉 Jump Squat (aim for a consistent 8-12 inch of height per jump)
4 basic steps for a full burpee.
Like any exercise, burpees have many variations.
There are plenty of burpee variations for EVERYONE.
200 Repetitions
200 reps is A LOT of up and down.
Somewhere along the way form is going to break down.
Take breaks as needed, but watch the clock.
If you’re cranking out 10 burpees per minute, you will complete 200 burpees in 20 minutes.
But here’s the deal… 10 rep bursts in the early stages of the challenge will be doable.
10 rep burst in the later rounds will not.
Get the reps you can, managing fatigue and safety.
Time
20 minutes is the time limit.
Challenge yourself to finish as fast as possible, remaining mindfully of technique and movement quality.
Adjustments to the Workout
If 200 reps are out of the question, decrease the reps.
Here are other possible rep target options:
✅ 150 burpees in 15 minutes or less
✅ 100 burpees in 10 minutes or less
✅ 50 burpees in 5 minutes or less
Each alternative requires a 10 burpee per minute pace, just fewer reps overall.
Another way to organize a tough burpee workout is to select a pace and hold to it over a time-frame.
Here are a few options using this
👉 Perform 1 burpee every 6 seconds
👉 Perform a burst of 10 burpees inside of every minute
With these rep schemes, the question is, how long can you go?
Stay Safe
It’s important to stay engaged mentally despite the fatigue hitting you like a tidal wave.
In the moment, establish a balance between rejecting thoughts of quitting, yet remain aware of how your body is handling the stress.
If at any time you feel the fatigue overwhelming your ability to move safely, take rest. Simple as that.
High intensity/extended duration physical activity is well know to breed sloppy movement and cutting corners on technique, which increases the risk of injury.
Mixtaping different disciplines of fitness to create unique workouts is a hobby of mine lately.
Yesterday, I found myself short on time. I had roughly 20 minutes to make some workout magic happen. Assessing the previous day’s workout, I decided on two modes of exercise:
The Lizard Crawl
Rowing
The goal: total body training effect (in under 20 minutes)
Short burst workouts are a perfect solution to time-restricted days. Days where I’m tight on time, but high on motivation. “Short”… not be confused with “easy”.
Generally, shortening a workout means the intensity gets cranked up to offset the decreased volume and duration.
It involves crawling forward (or backward) in a low prone position, much lower than a traditional bear crawl. The Lizard Crawl is a total-body exercise, well worth learning and working through the progressions.
Most people will feel limited by their upper body strength when Lizard Crawling. The strength needed in this particular range of motion may need some acclimation.
That being said, there are plenty of Lizard Crawl variations to accommodate any skill level.
Here’s an example:
The Lizard Crawl, though graceful and rhythmic when performed by great movers, sucks the life out of you across even moderate distances. It’s a very complex and demanding pattern.
Rowing, on the other hand, is, well, rowing.
The rowing erg is beautiful in its simplicity, yet brutal in its ability to break a person’s soul at higher intensities. Though machine-based, rowing is one of those near total body activities that I cannot recommend enough. Rowing is primarily a posterior chain, upper body pull/lower body push action.
A quality rowing erg will cost you some cash, but across the long-term, it is well worth the investment.
Turns out, the Lizard Crawl and rowing compliment each other perfectly.
I’ve created workouts in the past using short distance Lizard Crawls and 250-meter row intervals, but never beyond that distance. The 250-meter is a fantastic distance for an all out sprint.
Today I increased the challenge a bit, bumping the row up to 500-meters.
Here’s how the workout was structured…
Lizard Crawl for 20 yards
+
500 meter Row
Repeat for 6 rounds.
Rest for 60-90 seconds in between each round.
That’s it. Two movements and roughly 18 minutes of time to work with.
Warm-up with something, anything. A jump rope or some simple dynamic movements will work fine. I do not advocate skipping warm-ups all of the time, this situation is unique, an outlier.
A cheetah doesn’t ask a Gazelle for a chance to warm-up before pursuing it for nearly a mile, it’s worth considering a human may not always have adequate time to warm-up.
Many times, doing less things, but doing those things better makes for the best workouts.
Aesthetics and performance are built incrementally, piece by piece, workout by workout.
Thoughts and Suggestions…
Find a pace on the rower a few levels below your personal best. I aimed for a 1:35 min/sec pace for the 500-meter intervals, knowing that my best 500 meter was roughly 1:27 min/sec.
Why do this? Because you will not be able to maintain a personal best pace for 500-meters across 6 rounds, with incomplete rest periods and lizard crawling before hopping on the rower. Setting a challenging pace just below your best will get the training effect you’re after and allow room for progression in the future.
After standing up out of the rower, expect your heart rate to be sky-high. 60 seconds of rest will not feel long enough, and it shouldn’t. It’s incomplete rest by design. Use every second to collect yourself before the next round. Walk around slowly, stay upright and slow your breathing.
Keep in mind, a 500-meter row is not an easy distance to row on its own. Adding pre-fatigue in the form of a Lizard Crawl will zap you.
When rest comes to an end, force yourself into the Lizard Crawl. You’ll want to rest longer in later rounds but don’t. Stay strict. When rest is over, settle your breath and start crawling immediately.
Anticipate the first few rounds of Lizard Crawling to feel great, followed by a steep drop off.
If the full Lizard Crawl is too aggressive, scale it back. Head over to my YouTube page and search “Lizard Crawl”. You’ll find a bunch of different Lizard Crawl options I’ve played around with.