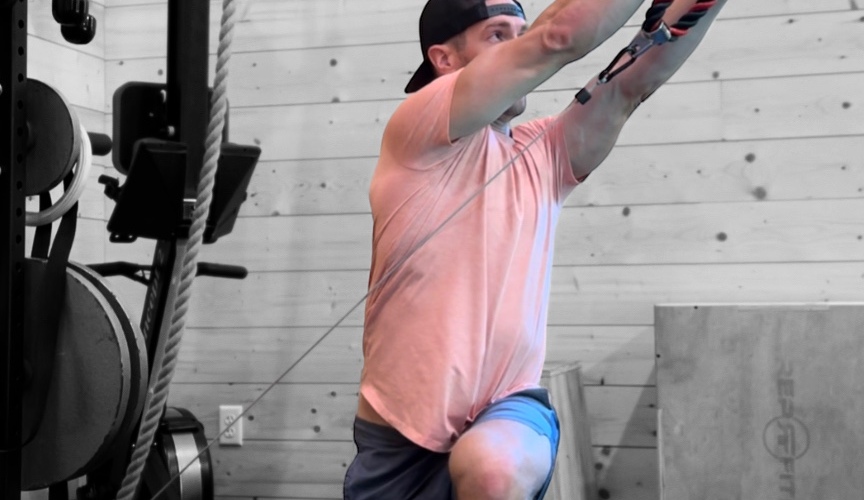
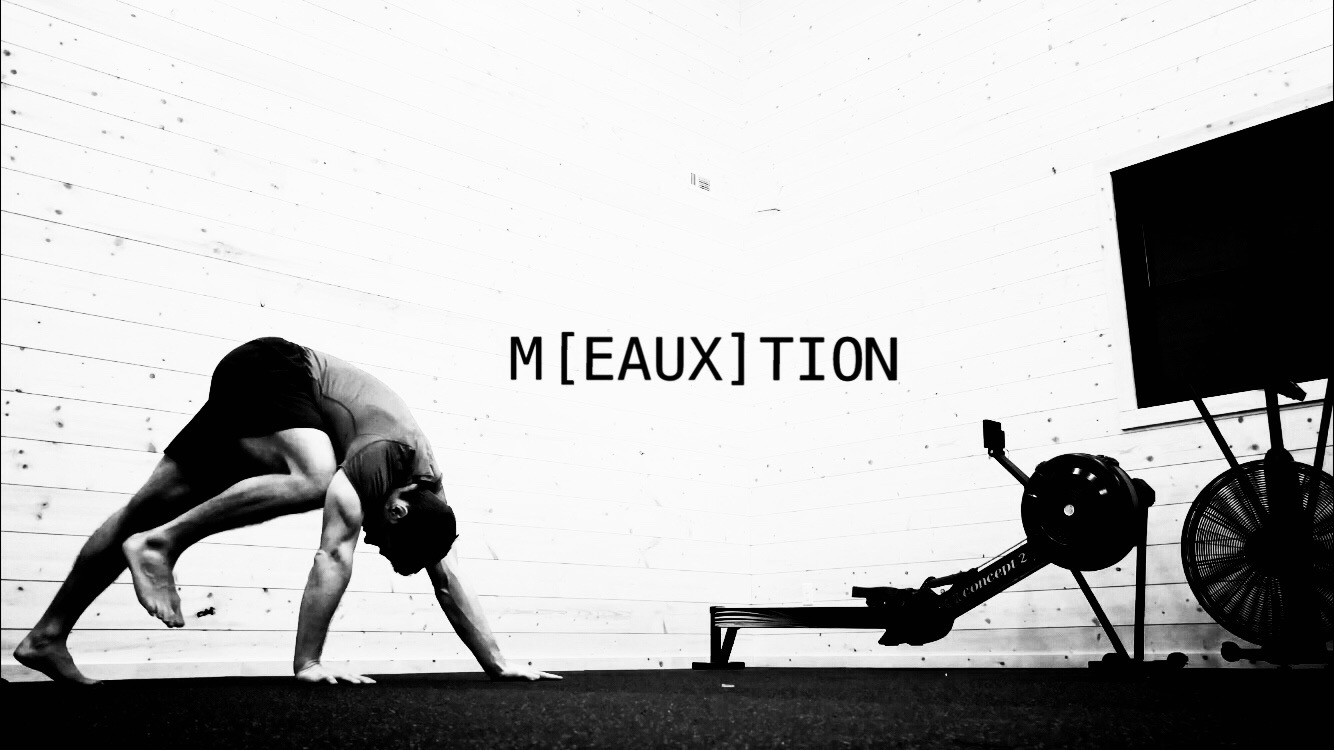
Locomotion| The Weighted Lizard Crawl

Motion

The lizard crawl is a total body locomotion pattern, made popular by Ido Portal.  

As great as lizard crawl exercise (bodyweight only) is, there are simple ways to make it harder if you’re interested, and that’s what this post is about.

Crawling exercises can be progressed similarly to a squat, deadlift, bench press or any other traditional resistance exercise. 

The key is increasing the challenge somewhere, somehow.  Make it harder.  

Progressive overload (adding weight) is a key strategy to continue building fitness, especially strength.  It keeps you in progress mode. 

Exposing the body to progressively greater demands (movement complexity, load, etc) is a pathway to build strength and mitigate injury.

Weak bodies seem to be at a higher risk for injury.

If a given stress overloads tissues beyond their capacity, injury often results.

This is an over-detailed article about my experience adding weight to the infamous lizard crawl, the “king” of locomotion training. 

Progressive Overload

Know your options.

Conventional methods of progression include:  

  •  Add resistance
  •  Add repetitions
  •  Increase training frequency
  •  Increase volume (sets x reps x resistance)
  •  Decrease rest periods 

Halts in progress require a quick audit and a few simple decisions. 

Training the same movements with the same weight, time under tension, reps/sets, etc… will yield the exact same results.

And if this seems like common sense, please considered common sense is not always so common.  

Adding more weight to a lift, movement or locomotion pattern is not ALWAYS the answer, but more often than not, it is a solid solution to many of the problems people encounter in their training.

Don’t be afraid to increase the load, incrementally and intelligently.  

As highlighted in the title of this blog post, I chose to add weight to the lizard crawl as the mechanism of progressive overload.

From sloppy to strong…

When I finally decided to attack the lizard crawl pattern, adding weight was the last thing on my mind. 

Early on, even simple crawling patterns exposed my sloppy technique, lack of endurance and heavy-handed/footedness.

Crawling short distances (15-20 yards) wore me out quick.  It was humbling.  I felt weak. My story is similar to others I’ve heard and read about across the internet. A strong guy in traditional lifts who could not move well on the ground without weight.

Strict crawling drills crushed me.  Moving naturally with detailed precision is HARD. 

I experienced a pretty dramatic change in movement quality by practicing basic crawling patterns like Beast Crawls (forward, back, and lateral) and Bear Walks.  

I’d section off 10-15 minutes of EACH workout for crawling practice, and I still do to this day.

Gains with the basic locomotion patterns evolved into disadvantaged crawling in low positions. 

With near daily practice, I became extremely efficient with lizard crawling.  My body acclimated and now understands the demands.  Adaptation is a beautiful thing.   If you want something in the gym, attack the shit out of it.  Be relentless.  

Crawling distances increased, tempo and pattern variations were added along with introducing crawling backward.  

I reached a point where adding more volume became a time suck and borderline ineffective.

Lizard crawling requires a low-to-the-floor body position, aggressive joint angles and a constant on/off body tension from head to toe.  The upper body and core demands are intense.  Plus, it’s easy to get twisted up with hand and foot placement.  

The lizard crawl pattern connects traditional strength work with movements that exist in between.  The transitions, gracefulness, soft interactions with the floor, twisting, turning, propelling the body from point A to point B.  

The Weighted Lizard Crawl


I have to believe people have added weight this pattern before the writing of this blog post.  If not, I am a visionary

Regardless, I was humbled by this movement progression.  

I added a 40lb weight vest and a pair of 10lb ankle weights around each leg. A simple weight vest is a very natural tactic to add weight to movements while keeping the hands free.

The weight vest loaded the upper body/torso, while the ankle weights challenged the lower body.  Adding the ankle weights is a simple way to load the articulating motion of the hips.  

This articulating motion is similar to hip CARs, but a bit less isolated and strict.

When weight increased with any exercise, generally reps/sets, duration, time under tension need some relief.  Usually, it’s just for a short time to give the body an opportunity to execute quality work, avoid unnecessary training injuries and adapt to the stress.

Keeping all training variables the same would be too aggressive and unmanageable. 

Factoring this in, once I added the weight, I immediately decreased the distance of the crawl and increased rest periods.  

Previously, my average bodyweight lizard crawl distance was around 40 yards, broken up into a 10-yard crawl forward/10 yard crawl backward (twice down and back).  

For the weighted lizard crawl, I more than cut that distance in half, crawling roughly 10 yards (5 yards forward and backward).  On this day, I worked a total of 6 sets.  It was enough to leave soreness in the days afterward.

I’d recommend anywhere from 5-8 sets of 10-15 yards of a technique-driven lizard crawling. 

As I mentioned before, adding load commonly means taking longer rest periods in between efforts.  I wasn’t super detailed on the rest periods, but they were long enough to feel damn fresh.  

There is absolutely no need to rush this.  Do it right, or don’t do it at all. 

Equipment Used

 10 lb Valeo Ankle Weights 

 MIR Short Weight Vest

There are plenty of weight vest brands to choose from, but MIR is a trusted name and I couldn’t be happier with my MIR weight vest.  It’s durable and the short version is awesome.

Arguably, ankle weights are, well, ankle weights.  

Although I did get a nice product referral for the Valeo ankle weights from a great trainer in Philadelphia.  My only advice here is to size up and buy heavier than you’d think. Also, buy a set that has adjustability (ability to remove the weights).  You can always lighten them up if needed, but it’s nice to have heavy ankle weights if needed.  

So, I added weight, should you?

The crappy (but honest) answer is, maybe or maybe not.  It depends on your experience and goals.

Have you played around with increasing distance and tempo using bodyweight only?  

If not, start there.

Initially, leverage basic lizard crawl variations.  Gradually add distance and play around with tempo.

Practice lizard crawl press ups, modified range of motion crawls.  Place emphasis on body position, technique, timing, and mechanics.   

Aim for efficiency.  

People like to knock efficiency in training, but the fact is being inefficient at everything wastes precious energy.  At some point, you want the work being performed to feel natural. 

When it’s natural and fully integrated into your body, it’s useable in the real world.

Adding load to the lizard crawl, in my opinion, increases the challenge exponentially.  Far beyond anything I’d experienced before.

Once you’ve added weight, expect the silky smooth crawling technique disappear.  

You’re fully engaged in a hybrid variation of resistance training now.  Ha.  

Muscles and joints will need some time to fully understand the stimulus and adapt to it. 

Just getting started with crawling?

If you’ve not yet added crawling exercises (even the basics) to your workouts, you must.  Just try it.  There’s nothing to lose and everything to gain.  Don’t make the mistake of marrying any particular tool or method.  Explore everything and integrate what’s useful.   

I talk about crawling patterns often.  Progressive crawling is excellent for building natural movement strength, endurance, and skill.  If you’re an avid lifter, add 5-10 minutes of crawling to your warm up.

Unsure where to start with crawling?  

Vahva Fitness and my YouTube channel are great resources to get exposure to crawling.  Anyone interested in ground-based movement training of any kind is referred to Movement20XX.  

My YouTube channel is LOADED with videos.  There’s plenty to watch, not a ton of boring commentary and I am always available for questions and conversation.  Simply enter the “crawling” into the search bar. 

Closing Thoughts…

The purpose of this article is to introduce people to one simple strategy of increasing the difficulty of the lizard crawl. 

Start with bodyweight based lizard crawl variations.

Don’t be a dumbass.   

Earn tougher movement progressions by practicing the basics.  

I referenced several good resources above, make sure you check those out.    

Lastly, leave a note on your experience, I love hearing from people.  


Cheers, 

Kyle 
Basics of The Ido Portal Training Method

Ido Portal

Ido Portal

{Photo Credit:  http://www.idoportal.com}

Ido Portal Method training is taking off like rocket and growing in popularity every single day.  

There’s a moutain of Ido Portal movement videos and articles all over the internet describing his techniques and teaching. 

[I do not speak for Ido Portal in any way.  Ido is a man with his own original thoughts and ideas.  Anything I write or discuss on this blog is my interpretation of information he’s published on his social media page, his old blog, Youtube interviews and various other sources.]

My background…

I have an extensive background in strength and conditioning, but it’s traditional in every sense of the word.  

It took years for me break away from deadlifts, squats, pushing, pulling, and core work… and expand into movement training.

Old habits die hard, but eventually, I dove head first into movement training.  

Gradually, I rebuilt my body, peeling away layers of stiffness, improving range of motion, coordination and newfound strength.

Thousands of people have done the same, many through the information in this article.

It’s amazing to see the feedback of those who’ve decided to take actionable steps toward building up their movement arsenal. 

The first time I encountered Ido Portal Method, I knew I was watching something different.  This was a much different approach to building fitness.  The training tactics were unlike anything I’d seen. 

Crawling, sprawling, twisting/turning, reaching, flowing, strength movements paired with Capoeira, gymnastics, hand balancing, dance, gymnastics, etc.

Ido Portal Method was like an open platform for many differnet styles of movement.  

Just when you think you’ve got it figured out, it changes shape, moves in a different direction.  

Since my initial exposure, I’ve spent a significant amount of time reading, watching, practicing and digesting Ido’s methodology.

This article is my translation of the basics of the Ido Portal Method. 

IMG_4167 

Ido Portal Training Methodology…

If you’re looking to get the summarized view of what drives Ido Portal’s movement methodology, the formula looks something like this:

Isolation—> Integration—> Improvisation

Step 1:  Isolation

Step 2:  Integration

Step 3: Improvisation

What I currently comprehend, the movement paradigm is a series of transitioning from phases.  

Isolation to integration to improvisation.

Ido Portal Method raised the bar with movement standards.

Most systems teach isolation (do this squat, then do this deadlift, then run up that hill, then do a pull-up) and stop there.   

Ido Portal Method takes it a step further.

Here are details on each phase.

Isolation

In the Ido Portal Method, Isolation based movement is essential for making progress.  

This is the base of the hierarchy.

Strength is a prerequisite for movement.

Being strong enhances movement capacity because you OWN every position.  

Isolation = building strength with movement patterns.

Movement patterns:  

  • Squats
  • Deadlifts
  • Lunges
  • Carrying
  • Crawling
  • Vertical Pulling
  • Vertical Pressing
  • Horizontal Pulling
  • Horizontal Pressing
  • Bent Arm and Straight Arm Upper Body Training
  • Glute-ham raises
  • Rotational patterns
  • Core training
  • Power Training (cleans, snatches, jerks, kettlebell swings, etc)
  • Stabilization drills

This is isolation.

You might be familiar with these exercises.  

There’s also a heavy emphasis on high tension bodyweight-based strength training exercises.

Body levers, hanging and climbing, dips, muscle ups, parallette work such as L-Sits, and Tuck Planches, single leg squats, single arm pressing, handstand push-ups and various locomotion patterns (crawling, rolling, etc.)

Gymnastics strength training.

Mixing traditional strength training with body-weight based exercise is a potent combination.  

These are time-tested, proven strength builders essential to physical development. 

Improving athleticism with Isolation style training opens doors to building movement sequences (performing several movements in a row) and evnetually fully improvised movement flow.   

Multi-planar strength and movement freedom.

The bottom rung of Ido’s movement classification system is often the highest rung for other training systems.  

HIGH. STANDARDS.

There’s a realm of physical expression that exists beyond getting fixated on sets, reps, putting more weight on the bar, numbers numbers numbers, or racing the clock to set new P.R.’s in a WOD.  

Handstands, leg-less rope climbing, ground-based movement flow training packed with locomotion patterns and bodyweight movement patterns are here.  

Our bodies are designed to move freely.   

 Flow

Ido Portal Method combines the best of many movement disciplines.

Integration

Integration is the point where movement sentences are formed from the words (isolation).  

A squat, is no longer just a squat.  

A squat is a stepping stone to another movement, and another, and another.  

The practice is evolves into a seamless flow, moving about.

More movements are integrated, creating series of movement patterns formulating a “sentence” of movement.  

  • Sidenote: There’s a heavy Capoeira influence. 

The ground conditioning (locomotion patterns, Capoiera, etc) combined with gymnastics/bodyweight/traditional strength training, fused with flexibility and mobility work is NOT NEW, but since it’s being repackaged and people are seeing incredible results, it’s definitely creating a paradigm shift in fitness.  

“Fitness” is less about who can build the best looking body or lift the most weight (both respectable pursuits), it’s about moving and how your body can perform when confronted with the known and unknown.

The shift is on and people are taking notice.

Nike has…

Ido Portal Nike

More Integration…

Integration builds on the physical preparation from isolation training.  

Pre-planned movement sequences make up part of the Integration phase.  This is similar to a dancer demonstrating a choreographed routine.  Just because the routine has been practiced for months doesn’t make it any easier to execute.  

I’ve watched the “Locomotion Research” video 50+ times.  Watching someone move like water is inspiring.  The movement sequences demonstrated in the video are deceptively difficult.  

Ground-based locomotion is a multi-planar movement requiring a level of body awareness, joint range of motion and on again/off again body tension most people rarely practice.  

Many of these dynamic patterns are animal-like.

People are often humbled by the amount of mobility and strength needed for locomotion patterns.

After the first few sessions, locomotion practice will leave you sore.  

The Lizard Crawl bridges the gap between “lifting weights” and putting those gains toward challenging movement patterns.

Crawling is difficult.  

If you’re not yet crawling, get into it.

Crawling patterns are effective for building coordination, spatial awareness, strength and movement capacity.  

Improvisation…

Ido has commented on numerous podcasts that improvised movement represents the highest form of human movement.  I couldn’t agree more.

Dominating isolation exercises makes the transition to integration significantly easier.  

With consistent practice of Isolation and Integration, one will arrive at the final progression of Ido’s movement philosophy… improvisation.

World-class gymnasts (pound for pound the strongest people on the planet) are rarely expressing improvised movement.  Competition routines are all pre-planned, practiced and choreographed prior.  

Improvisation is the combination of isolation and integration.  You’re essentially making it up as you go, or “flowing”.  Though it will likely take years of dedicated practice, improvised movement flows are achievable.  

This is where progression becomes important.  

Flowing like Ido Portal doesn’t happen overnight.  

Practice is king.  

I’ll spend less time describing the Improvisation phase of the Ido Portal Method because most folks need to focus on nailing down the elements of Isolation and Integration.  

In interviews, Ido has mentioned several times he thinks there is a dimension to be explored beyond Improvisation.  

Isolation and Integration Progress

The Ido Portal Method represents an incredible shift with how we view and define fitness.  

Humans are made to move (climb, run, jump, roll, carry, etc) and I think there is an emerging sector of people who want to experience the thrill of moving in this way.  

It’s important to clarify that traditional physical fitness modalities aren’t obsolete.  Nor should they be.  

A person should spend a great deal of time gaining ground in the Isolation phase, grooving technique, building strength, improving joint control throughout a range of motion.  

Hammering away on the basics (squats, pulling, pressing, etc) is fundamental to progress.  

The goal is to build strength, stability, mobility (the missing link of fitness), conditioning and constantly expand movement capacity.  

Conditioning is also important, and should never be overlooked.  

Train Like Ido Portal Method without the Pricetag

Several years ago, I started looking for alternatives to the Ido Portal Method for several reasons.

  1.  Ido Portal doesn’t offer programs through his website.
  2.  Training privately with Ido and his team is EXPENSIVE ($2500+)

Like many of you, I couldn’t afford $2500 for a workout program, no matter how spectacular. 

I started researching alternative programs with the belief that similar results could be achieved while investing less money.

With enough research, I found what I was looking for, and what I felt other people could benefit from as well.

Here are two amazing programs to check out:

  • Movement20XX
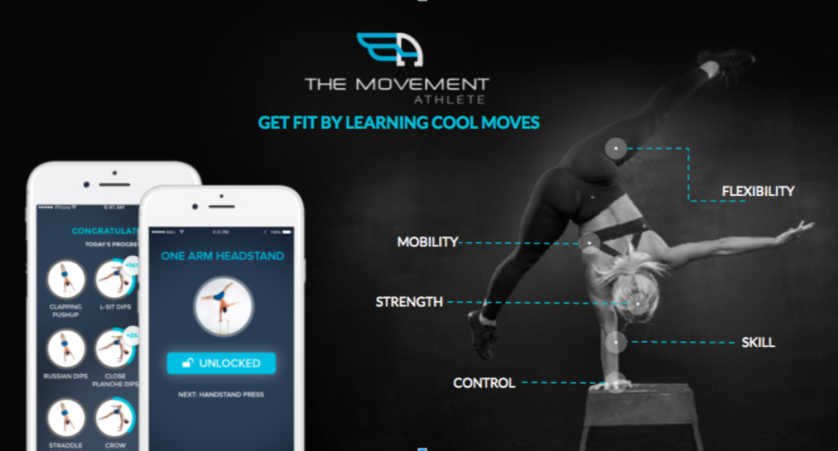
  • The Movement Athlete

Combining all of these programs creates a comprehensive training system.

Strength, movement training and mobility.   

Movement 20XX  teaches ground-based movement, locomotion patterns (lizard crawl, etc),movement sequences and improvised flow work. 

The Movement Athlete will build strength using bodyweight exercises.  Strength is critical for performance and long-term health.  Pistol squats, one arm push ups, handstands, l-sits, body levers, upper body pulling, etc.  

Here’s a little more about each program. 

Movement 20XX

Screen Shot 2019-11-15 at 11.12.03 AM

Movement 20XX is a ground-based bodyweight training system that teaches many of the locomotion patterns and flow work found in Ido Portal Method.   

Locomotion mainly consists of quadrupedal ground-based exercises like crawling (lizard Crawl, etc), switches, transitions, etc.

Integrating Movement 20XX into my own workout regimen has been awesome.  

I started by supplementing my traditional resistance training workouts with a few basic crawling exercises, and built up from there.  

Over time I strung together exercises to create repeatable movement sequences.  

Movement 20XX integrates the best elements from different movement disciplines to create a hybrid system of movement training.  

Crawling, transitions, switches, flow, etc. 

I started Movement 20XX with a stiff spine, poor hip and shoulder mobility, tight hamstrings, and mediocre movement capacity.  

After about 4 weeks of dedicated movement practice, my body acclimated to the mechanics and demands of the patterns.

Using the curriculum from Movement20XX, I made more movement gains in 2 months then I had in the previous 5 years.  

Interestingly, my traditional lifts saw boosts in performance.  Deadlift, squat, pull-ups and pressing all improved, felt smoother, etc.

If you want to explore movement, this is the program to get. 

👉 Learn more: Movement20XX

The Movement Athlete  

The Movement Athlete

Strength is critical for improving movement performance.

If you get nothing else from this article, please, remember that. 

Movement Athlete Academy is a bodyweight-based strength program designed to improve performance in high powered movement patterns:

  • Muscle Ups
  • Handstand Push Ups
  • Single Arm Push Ups
  • Single Arm Body Rows
  • Pistol Squats
  • Handstands
  • L-Sits
  • Human Flags (aka: body levers)
  • Back Levers

Sadly I used to think bodyweight training was dumb.  If I wasn’t lifting weights, I was wasting time in the gym.

When I committed myself building effective bodyweight movements, my strength increased, everywhere.

The human body is adaptation machine. 


Movement Athlete Academy is a smart training system, built on the principles of:

  • Smart exercise progression.
  • Progressive overload.
  • Progressive exercise complexity and volume.
  • Rest and Recovery.

The workout design, exercise progressions and step-by-step tutorials make Bodyweight Athlete a great bodyweight-based program to invest in.    

Bottomline…

Find a program and follow the details.  

Invest the money in learning effective training techniques, commit yourself to the curriculum and you’ll get phenomenal results.

Stay Tuned 

If you’ve enjoyed this post, check out:

Cheers to the Basics of The Ido Portal Training Method…

KG

SaveSave

Metabolic Conditioning: Fast Workouts for Big Gains

Motion

Metabolic conditioning, often shortened to “metcon,” is a type of fitness training designed to supercharge your metabolism—the engine that burns calories in your body.

Think of your metabolism like a car engine. like how some engines burn fuel more efficiently, metabolic conditioning helps your body become better at using energy. This means you can get stronger, faster, and leaner, all while improving how your heart and lungs work.

Let’s dive into what metabolic conditioning is, why it’s important, how you can do it, and when it’s best to include it in your fitness routine.

What is Metabolic Conditioning?

Metabolic conditioning is a mix of high-intensity exercises. These workouts raise your heart rate using primarily resistance-based moves with little rest between exercises.

Why Do Metabolic Conditioning?

1. Burns more calories. Even after you stop, your body keeps burning calories at a higher rate. This is great for losing weight or staying lean.

2. Improves endurance. Regular metcon training makes your heart and lungs work better together. So, you can do activities like running, swimming, or biking longer without getting as tired.

3. Builds strength and muscle. Lifting weights or doing bodyweight exercises makes you stronger. It also builds muscle. This helps your body burn more calories even when you’re not working out.

4. Time-efficient. This is because they’re so intense. This means you can get a great workout in a shorter amount of time.

How to Do Metabolic Conditioning

Metabolic conditioning workouts usually combine strength training exercises with cardio exercises. For example, you might do a circuit. It includes push-ups, squats, jumping jacks, and mountain climbers. You move from one exercise to the next with little rest. The key is to pick exercises that work different parts of your body and to do them at a high intensity.

Here are some tips:

  • Start Slow. If you’re new to metcon, start with simpler exercises and shorter workouts. You can add more challenging exercises and longer circuits as you get stronger.
  • Keep it varied. Mix up your exercises to stay interested and to work different muscles.
  • Listen to Your Body. Metcon is intense, so it’s important to rest when necessary and not push yourself too fast.

When to Do Metabolic Conditioning

How often you include metcon workouts in your week depends on your goals and fitness level, but 2-3 times a week is a good starting point for most people. Make sure to have rest days between to let your body recover.

A sample training week could look like this:

  • Monday: MetCon
  • Tuesday: Mobility + Zone 2 Cardio
  • Wednesday: MetCon
  • Thursday: Rest Day
  • Friday: MetCon
  • Saturday: Mobility + Zone 2 Cardio
  • Sunday: Rest Day

Metabolic conditioning workouts are great for people with busy schedules, as they can be performed in 20-30 minutes from start to finish, with the higher intensity portion of the workout lasting 10-15 minutes.

Final Thoughts

Metabolic conditioning is a powerful way to boost your fitness by improving how your body uses energy. It helps you burn more calories, build muscle, and increase your endurance, all in a time-efficient way.

Adding metcon workouts to your routine can help you achieve many fitness goals. They also keep your workouts fun and hard. Remember to start slow, keep it varied, and listen to your body to get the most out of your metabolic conditioning sessions.

Sissy Squat Flow!

Movement Flow

Single Arm vs. Two Arm Kettlebell Swings: A Complete Breakdown

Motion
cable lifts

Functional Cable Chops vs. Lifts: What’s the Difference?

Motion
Overhead Cossack Squats

Unlock Your Fitness with Overhead Plate Loaded Cossack Squats

Motion

Power Up Your Push-Ups: Time Under Tension Techniques for Ultimate Muscle Activation

Motion

Push-ups are a classic bodyweight exercise that works the chest, shoulders, triceps, and core. Push-ups can be modified to accommodate different fitness levels and can be done anywhere without equipment. If you’re looking to challenge yourself and take your push-up game to the next level, you might want to consider increasing the time under tension.

What is Time Under Tension?

Time under tension refers to how long your muscles are under strain during an exercise. The longer your muscles are under tension, the more they have to work, which can lead to greater gains in strength and muscle size. 

Research has shown that adding time under tension to resistance training can significantly benefit muscle building and strength gains. One study found that performing slower eccentric contractions led to greater muscle activation and increased muscle protein synthesis compared to traditional resistance training methods.

review of multiple studies found that time under tension was a crucial factor in promoting muscle hypertrophy, or muscle growth, in resistance training 

Here are three different ways to increase the time under tension with your push-up routine.

Slow Eccentric Push-Ups

The eccentric portion of an exercise is the lowering phase. Slow eccentric push-ups focus on lowering your body to the ground as slowly as possible. 

Lower your body down towards the ground as slowly as possible, taking at least 3-5 seconds to complete the lowering phase. Once you reach the bottom of the push-up, quickly push yourself back to the starting position.

Slow Concentric Push-Ups

The concentric portion of an exercise is the lifting phase. With slow concentric push-ups, you’ll focus on pushing yourself up from the ground as slowly as possible. 

Lower yourself down towards the ground quickly, then push yourself back up to the starting position, taking at least 3-5 seconds to complete the lifting phase.

Slow Eccentric and Concentric Push-Ups

You can add time to eccentric and concentric phases of the push-up for a wicked challenge. Slowing the lowering and lifting of every repetition will light up your chest, arms, and shoulders

Lower your body down towards the ground taking at least 3-5 seconds to complete the lowering phase. Once you reach the bottom of the push-up, pause briefly before pushing yourself back up to the starting position for another 3-5 seconds.

Assuming you perform eight repetitions with 5 seconds down and 5 seconds up, you’ve just accumulated 80 seconds under tension in a single set.  

Adding time under tension to your push-ups can significantly increase the difficulty and boost gains. Incorporating slow eccentric, slow concentric, or slow eccentric and concentric push-ups into your routine will challenge your muscles in new ways, leading to greater strength and muscle size.

Improve Posture and Strength with These 3 Horizontal Row Variations

Motion

Dumbbell rows are great for developing upper back strength, improving posture, and engaging core muscles. Rows are versatile exercises that can be performed with various equipment and in different variations to target other muscle groups and provide a well-rounded upper-body stimulus. By rowing consistently and at the proper ratios, you’ll experience postural and strength improvements while mitigating injury due to muscular imbalances.  

This blog post will share three horizontal row variations to explore in your training.  

Benefits of Horizontal Pulling Exercises (Rows, etc.)

A sufficient ratio of upper-body pulling exercises in a resistance training program is critical for offsetting pushing exercises and keeping muscular balance. Most people will generally benefit from performing twice as many pulling exercises as pushing exercises.  

The benefits of horizontal pulling exercises (aka rows) include:

  • Improved posture
  • Balanced muscle development (offset pushing exercises)
  • Engaged core muscles
  • Improved athletic performance
  • Exercise variety
  • Injury prevention
  • Post-workout recovery

3 Different Row Variations to Try in Your Next Workout

Bench-Supported Dumbbell Rows

The bench-supported dumbbell row exercise is performed by placing one hand on a bench or chair for support, with feet fixed in a square or slightly staggered firmly to the ground. The bench support allows for a stable base and reduces strain on the lower back. This exercise is excellent for beginners and effective for advanced trainees using heavier dumbbells.

Technique Tips:

  1. Use the supporting hand on the bench sparingly.
  2. Don’t make the mistake of leaning into the bench too hard.
  3. Maintain light hand pressure.
  4. Row the dumbbell to the lower rib cage while keeping your elbow tight to the side body. 

Bench-supported rows primarily target the rhomboids, trapezius, and latissimus dorsi, while also engaging the core muscles and lower back.

Alternating Kettlebell Gorilla Rows

Gorilla rows are one of my favorite rowing exercises because they’re done from an athletic standing position and challenge coordination, stability, and strength. Gorilla rows are a fantastic addition to high-intensity complex training for those interested in metabolic conditioning workouts.

Note:  Dumbbells can be used for this exercise. However, kettlebells will feel most natural due to the height of the handle.

High Plank Dumbbell Rows

Performing dumbbell rows from a high plank position, also known as the plank row or the renegade row, offers unique benefits, challenges, and variations to the traditional dumbbell row exercise.

Rowing while maintaining the high plank position challenges the core stabilizers, making it a great functional exercise for improving overall strength and stability. The major knock on this exercise variation is that you’ll be limited with the weight you pull. Don’t expect to make maximal strength gains from a high plank position.

The uniqueness of this exercise lies in its combination of strength, stability, and balance training.

Discover the Benefits of Dynamic Core Training

Motion

Dynamic core training is essential for functional fitness because it mimics our daily movements and sports and improves our ability to perform lifting, bending, twisting, and reaching more efficiently. A strong and stable core also helps to improve posture, reduce the risk of injury, and enhance athletic performance.

What is Dynamic Core Training?

Dynamic core training aims to improve core strength, stability, and function in real-life movements, such as bending, twisting and reaching. Unlike traditional static core exercises, which involve holding a position for a time, dynamic core exercises involve movement patterns that engage multiple muscle groups in the core and often other areas of the body.

Multi-planar dynamic core training is a type of core training that involves movements in multiple planes of motion rather than just in a single plane (such as up-and-down or side-to-side). This type of training focuses on developing core strength and stability using movement in all three planes of motion: sagittal (forward and backward), frontal (side-to-side), and transverse (rotational).

Multi-planar dynamic core exercises challenge the body to stabilize and control movement in multiple directions, which can improve overall athleticism, coordination, and balance. They can also help prevent injury by strengthening the muscles and joints in the core and improving overall body mechanics.

Examples of dynamic core exercises include diagonal cable chops and lifts, macebell swings, rotational medicine ball throws, and deadbugs.

Is Dynamic Core Training Different than Traditional Core Training?

Traditional core exercises, on the other hand, typically involve isolated movements that focus on strengthening individual muscles within the core, such as crunches, sit-ups, and planks. While these exercises can be effective in building core strength and stability, they often neglect the vital role that the core plays in dynamic movements. Traditional core exercises may not translate as well to real-life movements and may not provide the same functional benefits as dynamic core training.

3 Examples of Dynamic Core Training Exercises

Macebell 360 Swings

Macebell 360 swings are a unique circular strength training exercise that requires the use of the entire body, focusing on the core muscles to generate power and momentum as the macebell is swung around the body in a circular motion.

The swinging motion of the macebell creates a rotational force that challenges the core muscles to maintain stability and control. This exercise strengthens the core muscles and improves the body’s ability to transfer force from one movement to another, which is vital for sports and other activities.

Deadbugs

Deadbugs are bodyweight-only dynamic core exercise. Deadbugs involve movement and coordination, requiring the core and hip muscles to work together to maintain stability and control. The alternating motion of the arms and legs challenges the body to maintain balance and control, which improves overall movement efficiency and enhances the body’s ability to transfer force from one movement to another.

The benefits of deadbugs include:

  • Improves core strength and stability
  • Develops neuromuscular control and coordination
  • Promotes better posture and spinal alignment
  • Helps prevent and alleviate lower back pain and injury
  • Enhances overall athletic performance
  • Targets specific muscles, including rectus abdominis, obliques, transversus abdominis, hip flexors, and hip adductors
  • Corrects muscle imbalances
  • Low-impact exercise that is easy on the joints
  • Can be modified to accommodate different fitness levels and goals
  • Improves breathing mechanics and oxygen delivery
  • Deadbugs can be done almost anywhere without equipment

Half-Kneeling Diagonal Cable Lift

Half-kneeling diagonal cable lifts are a rotational and diagonal movement pattern that challenges the body to maintain balance and control, improving overall movement efficiency and enhancing the body’s ability to transfer force from one movement to another. The added resistance from the cable or resistance band makes the exercise more effective in developing strength and power.

Notice the cable moving across the body from the hip to the opposite side shoulder. This creates a unique challenge for the body to navigate.

Benefits of the diagonal cable lifts include:

  • Develops rotational power and coordination
  • Enhances balance, stability, and coordination
  • Increases range of motion and flexibility in the hips and shoulders
  • Reduces the risk of lower back pain and injury
  • Enhances overall athletic performance
  • Challenges the nervous system and enhances neuromuscular control
  • Can be done using a variety of equipment, including cables, resistance bands, or dumbbells
  • Helps improve posture and alignment
  • Improves proprioception and body awareness

The diagonal movement pattern of cable lifts also helps engage the obliques and transversus abdominis, essential muscles for stabilizing the spine and improving overall core strength and stability.

How Kettlebell Swings Can Help You Burn Fat and Get in Shape

Motion

Kettlebell swings are a dynamic exercise that’s been proven to be a powerful tool for weight loss, especially when shedding unwanted fat. Kettlebell swings are a highly effective exercise for fat loss due to their high calorie burn, total body workout, cardiovascular benefits, functional movement, and low-impact nature.

This blog post will examine why kettlebell swings are one of the best exercises for fat loss and explore the science behind their effectiveness.

First, let’s define what kettlebell swings are. I won’t assume everyone reading this has been swinging kettlebells for years. Here’s what swings look like. My YouTube and Instagram have tons of clips of me swinging.

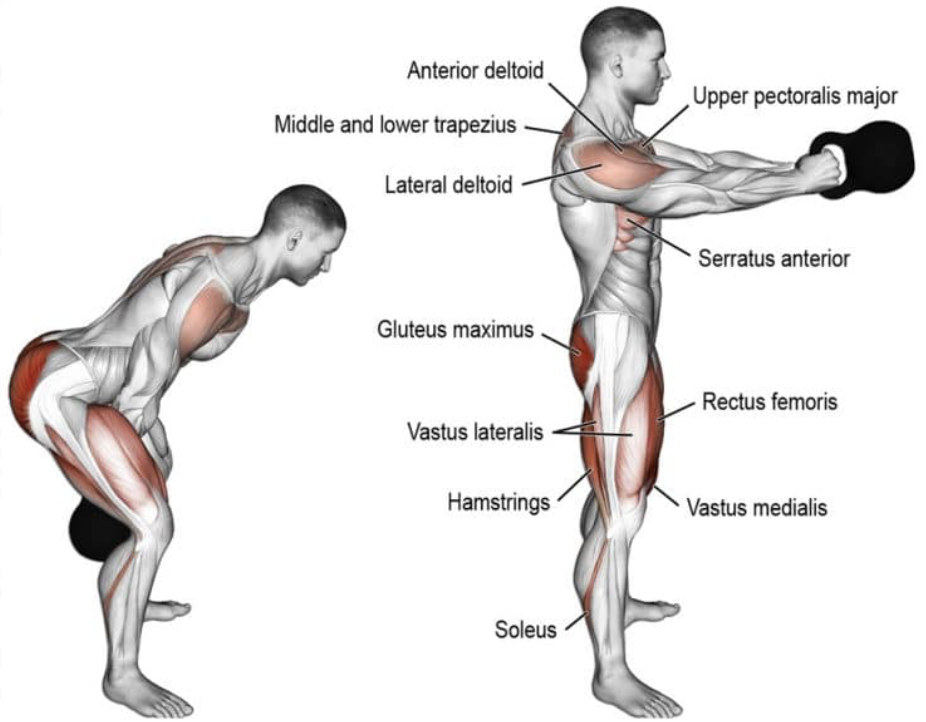
Kettlebell swings are a ballistic exercise that involves swinging a weighted ball-shaped object, known as a kettlebell, between your legs and up to shoulder height. This movement engages your glutes, hamstrings, quads, core, and back muscles.

So why are kettlebell swings the best exercise for fat loss?

High Calorie Burn

Kettlebell swings require significant energy output and have been shown to burn a lot of calories quickly. Studies have shown that kettlebell swings can burn up to 20 calories per minute, making them one of the most effective exercises for fat loss.

Total Body Workout

Kettlebell swings exercise an extraordinary number of muscle groups simultaneously, including the legs, glutes, core, and back. This full-body workout is ideal for increasing strength and conditioning and promoting fat loss.

Improved Cardiovascular Health

Kettlebell swings are a high-intensity exercise that gets your heart rate up quickly. This type of cardiovascular training has been shown in studies to improve heart health, boost metabolism, and increase fat burning.

Functional Movement

Kettlebell swings mimic (and enhance) many daily movements, such as lifting and carrying heavy objects. This functional movement pattern helps improve overall fitness and enhances our ability to perform daily activities efficiently. 

Improve Maximal and Explosive Strength

Kettlebell swings are a powerful exercise for building muscle and improving overall fitness. The explosive nature of the movement requires a significant amount of force to be generated by the lower body muscles, making it an effective way to improve strength and power.

The study “Kettlebell swing training improves maximal and explosive strength” was published in the Journal of Strength and Conditioning Research in 2014. The study investigated the effects of kettlebell swing training on maximal and explosive strength in the lower body. The participants were 16 recreationally active men and women randomly assigned to either a kettlebell swing training or a control group.

The kettlebell swing group trained with kettlebell swings twice a week for six weeks, while the control group did not perform any resistance training during the study period. The kettlebell swing training program consisted of three sets of 20 kettlebell swings with moderate weight.

After six weeks of training, the kettlebell swing group showed significant improvements in maximal and explosive strength in the lower body compared to the control group. The researchers concluded that kettlebell swing training effectively improves lower body strength and power output.

Low Impact Exercise

Kettlebell swings are a low-impact exercise, which means they put less stress on your joints and muscles compared to high-impact activities like running. This makes swings an excellent option for individuals looking to lose weight but may have joint or mobility issues.

How Many Kettlebell Swings Should I do?

Most people will see fantastic results (after about 4 weeks) from performing 75-150 repetitions of kettlebell swings in a single workout, 2-3 days per week. The sensible approach for beginners is to start with lower repetitions an

Over time, the swing volume can increase by adding repetitions to each work set, or by adding an additional work set.

Fix Rounded Shoulder Posture with Face Pulls

Motion

Face pulls are a simple exercise that offers an effective fix for rounded shoulder posture, relief of shoulder and neck pain, and boosts shoulder stability and overall upper body performance. Adding multiple sets of face pulls into your workouts 2-3 days per week will make you feel and see the difference with your shoulders.

Face Pull Demonstration

Below is a video clip of a standing cable face pulls using the ANCORE functional/portable cable machine:

I’m gripping the ends of a tricep rope, leading with the elbows and pulling outside the ears. Face pulls aim to pull as far back as possible while squeezing the shoulder blades together and keeping the rest of the body calm. Include a brief pause with the hands outside the ears.

What are the Benefits of Face Pulls?

Benefits of face pulls include:

  • Improved posture
  • Reduced risk of injury
  • Relieve neck and shoulder pain
  • Increased range of motion
  • Enhanced shoulder stability
  • Restore muscular balance
  • Develop upper body strength
  • Improved aesthetics
  • Boost athletic performance with overhead movements

Improved posture: Face pulls can help correct rounded shoulders and improve posture by strengthening the upper back muscles. You can reverse that turtle-like posture. 

Increased upper body strength: Face pulls target multiple muscle groups: upper back, rear shoulders, and rotator cuff muscles. These muscles make a valuable contribution to upper body strength gains.

Reduced risk of injury: Strengthening the rotator cuff muscles can help prevent shoulder injuries, especially in athletes who perform overhead movements.

Enhanced shoulder stability: Face pulls can improve shoulder stability by strengthening the muscles that surround the joint, making it more stable and less prone to injury.

Improved muscle balance: Many people overwork their chest and neglect their upper back muscles, leading to muscle imbalances. Face pulls can help correct these imbalances by strengthening the upper back muscles.

Increased range of motion: Face pulls can improve your shoulder’s range of motion, making it easier to perform other exercises such as bench presses, overhead presses, and pull-ups.

Reduced neck and shoulder pain: Strengthening the upper back muscles with face pulls can help reduce neck and shoulder pain caused by poor posture or long hours of sitting.

Enhanced athletic performance: Strong upper back muscles and improved shoulder stability can translate into better performance in sports that require overhead movements, such as volleyball, basketball, and tennis.

Improved aesthetics: Developing a strong and defined upper back through face pulls can improve your overall physique and enhance your appearance.

Exercise Technique for Face Pulls

  1. Attach a rope or band to a high pulley on a cable machine or secure a resistance band to a sturdy anchor point.
  2. Stand facing the machine or anchor point, grasp the rope or band with a neutral grip (palms facing each other), or grip the end of a tricep rope.  
  3. Step back to create tension.
  4. Keep your feet shoulder-width apart, engage your core, and maintain a slight knee bend.
  5. Pull the rope or band towards your face while keeping your elbows high and wide.
  6. Hands will finish outside the ears with the upper arm bone at shoulder height.
  7. Pause briefly at the end of the movement, then slowly return to the starting position.

Where in the Workout? Sets and Reps?

Face pulls can be scheduled in a workout as a warm-up or an accessory exercise. Personally, I prefer to slip Face Pull into my warm-up (prior to resistance training or metabolic conditioning efforts) or as part of a tri-set.

The reality is it’s less critical where you perform them in a workout and more important that you’re doing them regularly. If you own a cable machine or resistance bands, you can bang out a quick set of face pulls whenever. Just make sure you’re staying consistent for noticeable results.

The recommended frequency for face pulls is 2-3 times per week, with 3-4 sets of 10-15 reps per session.